Description
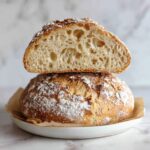
This Rustic Italian Crusty Bread recipe yields a classic, homemade loaf characterized by a crispy crust and chewy interior, perfect for sandwiches, dipping in olive oil, or serving alongside your favorite Italian dishes. Utilizing simple ingredients and a straightforward process, this bread is a rewarding baking project for bakers of all skill levels.
Ingredients
Scale
Dry Ingredients
- 4 cups all-purpose flour
- 1 ½ tsp active dry yeast
- 2 tsp sea salt
Wet Ingredients
- 1 ½ cups warm water (110°F / 43°C)
- 2 tbsp extra virgin olive oil
Instructions
- Activate the yeast: In a large mixing bowl, combine the warm water and active dry yeast. Let the mixture sit for about 5 minutes until it becomes frothy, indicating the yeast is active.
- Mix dry ingredients: Stir in the all-purpose flour and sea salt to the yeast mixture until a shaggy dough forms.
- Knead the dough: Transfer the dough onto a floured surface and knead for approximately 10 minutes until it becomes smooth and elastic, which helps develop gluten for structure.
- First rise: Lightly oil a large bowl and place the dough inside, turning to coat it with oil. Cover with a damp cloth and let it rise in a warm place for about 1 hour, or until the dough has doubled in size.
- Shape the loaf: Gently punch down the risen dough to release air, then shape it into a round loaf, preparing it for the final proof.
- Preheat the oven: Set your oven to 450°F (230°C) and allow it to fully preheat, using a baking stone or sheet if available for best crust development.
- Final proof: Let the shaped loaf rest uncovered under a cloth for 30 minutes. This resting time allows the dough to slightly rise again and relax.
- Score the loaf: Using a sharp knife, make slashes on the top surface of the loaf. This helps control the expansion of the bread during baking and adds a rustic look.
- Bake: Place the loaf on the preheated baking stone or sheet and bake for 30-35 minutes until the crust turns golden brown and the bread sounds hollow when tapped at the bottom.
- Cool: Remove the bread from the oven and let it cool on a rack completely before slicing to finish the baking process and improve texture.
Notes
- Use warm water at approximately 110°F (43°C) to properly activate the yeast without killing it.
- Kneading time is crucial to develop gluten and ensure the bread has structure and chewiness.
- Allowing the dough to rise in a warm place speeds fermentation but avoid excessively hot spots that can kill the yeast.
- Using a baking stone helps achieve a crispier crust by evenly distributing heat.
- Cooling the bread completely before slicing prevents it from becoming gummy inside.