
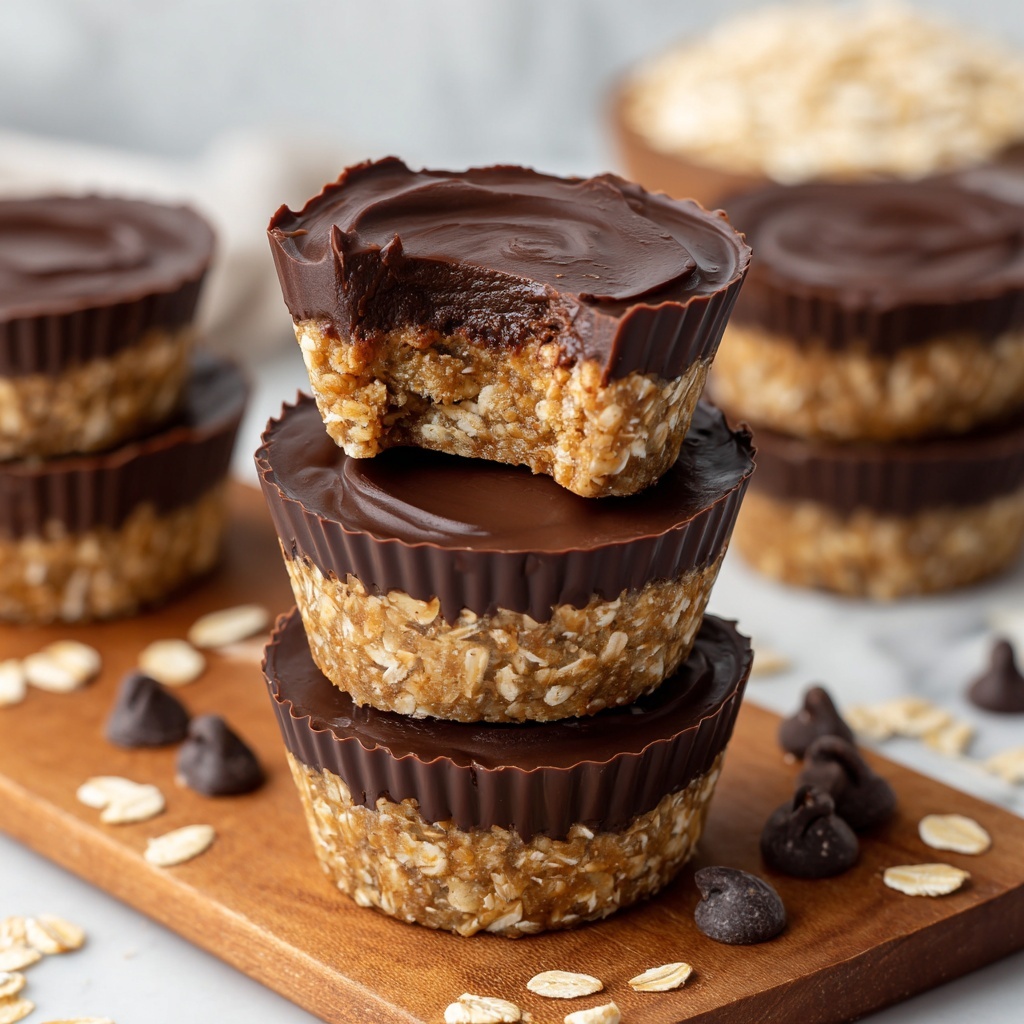
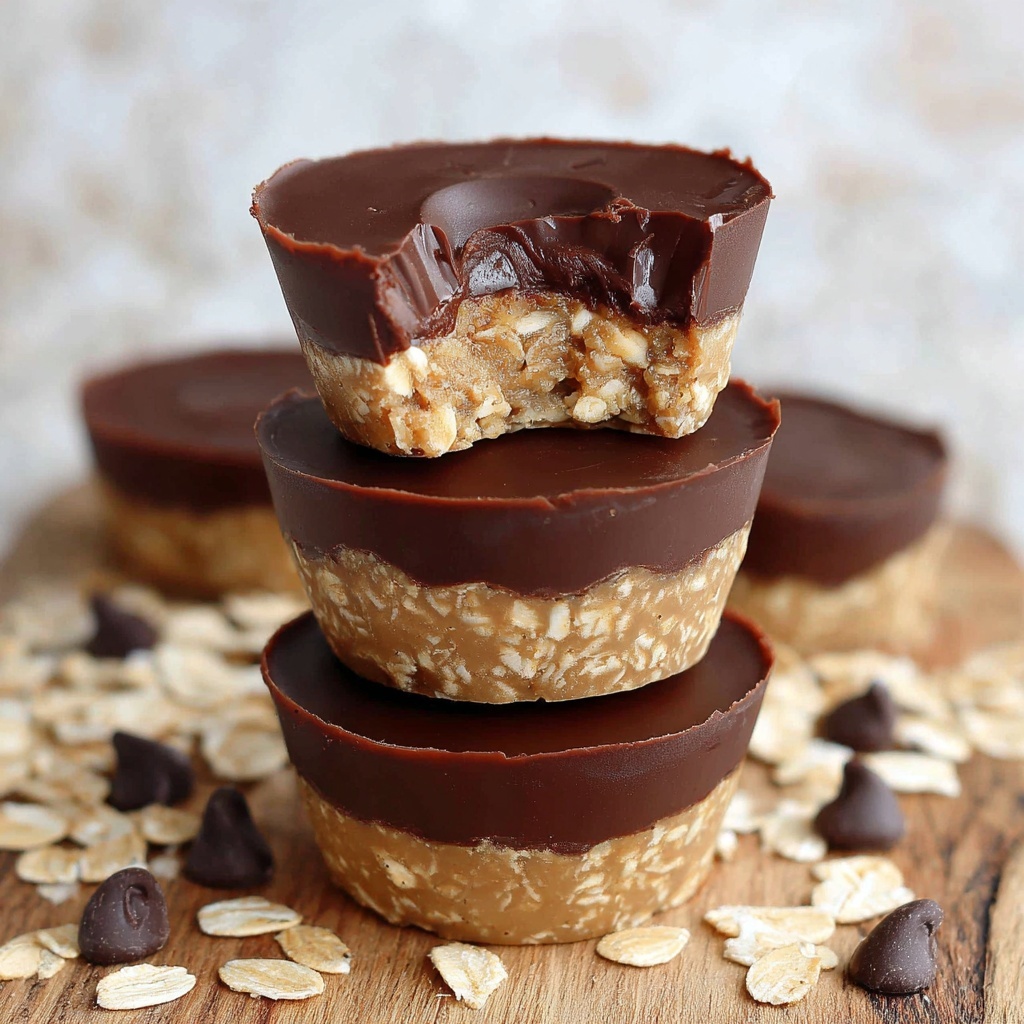
If you’re craving a sweet, satisfying snack that comes together without turning on the oven, this No Bake Peanut Butter Oat Cups Recipe is an absolute game-changer. Combining the natural creaminess of peanut butter with the hearty chew of rolled oats and a delightful touch of honey or maple syrup, these oat cups are as nutritious as they are delicious. They’re perfect for breakfast on the go, a quick mid-afternoon pick-me-up, or a kid-friendly treat that everyone will love. And the best part? They require minimal ingredients and zero baking, making them the ultimate easy snack to whip up anytime.
Ingredients You’ll Need
Simple, wholesome ingredients come together to create these peanut butter oat cups, each playing a key role in texture, flavor, and sweetness. The beauty of this recipe is how accessible every component is, and how perfectly they all blend to form a nourishing snack.
- Old fashioned rolled oats: For a chewy, hearty texture that holds everything together.
- Natural peanut butter: Adds creamy richness and a robust nutty flavor that’s the star of the show.
- Honey or maple syrup: Provides natural sweetness to balance the peanut butter’s saltiness.
- Melted coconut oil: Helps bind the ingredients while adding a subtle tropical aroma.
- Vanilla extract: Enhances overall flavor with a sweet, fragrant note.
- Salt: Just a pinch to amp up the sweetness and deepen the flavors.
- Mini chocolate chips: Offers little bursts of melty chocolate magic throughout the cups.
- Chopped peanuts (optional): Adds a crunchy contrast and extra peanut power.
How to Make No Bake Peanut Butter Oat Cups Recipe
Step 1: Prepare Your Muffin Tin
This first step sets the stage. Line a 12-cup muffin tin with paper liners or lightly grease each cup. This ensures your oat cups come out cleanly and look just as tempting as they taste.
Step 2: Mix the Wet Ingredients
In a large mixing bowl, combine the peanut butter, honey (or maple syrup), melted coconut oil, vanilla extract, and salt. Stir everything together until the mixture is silky smooth and perfectly blended—this is the creamy base that binds the oats.
Step 3: Add Oats and Mix
Now stir in the rolled oats, making sure each oat is coated with that luscious peanut butter mix. This step is crucial for the texture—fully coating the oats guarantees every bite will hold together nicely without crumbling.
Step 4: Fold in Chocolate and Peanuts
Gently fold in the mini chocolate chips and chopped peanuts if you’re using them. This distributes delicious pockets of sweetness and crunch without overpowering the oats.
Step 5: Fill and Firmly Press Into Cups
Evenly divide the mixture into your prepared muffin tin cups. Use the back of a spoon to press the mixture down firmly in each cup—compactness is key to keep these oat cups intact and easy to eat.
Step 6: Chill Until Set
Pop the muffin tin into the refrigerator for at least an hour. This chilling time allows the coconut oil and peanut butter to firm up, turning the mixture into perfectly shaped, grab-and-go snacks ready to enjoy.
How to Serve No Bake Peanut Butter Oat Cups Recipe
Garnishes
These oat cups shine on their own but feel free to elevate with a sprinkle of flaky sea salt, a drizzle of melted dark chocolate, or even a few extra chopped peanuts on top for presentation and punch of flavor. Fresh berries can also add a vibrant, juicy contrast when serving.
Side Dishes
Pair these cups with a glass of cold milk for a classic combo or a cup of herbal tea or coffee for a comforting snack break. They also complement a bowl of fresh fruit or yogurt, making breakfast feel indulgent yet wholesome.
Creative Ways to Present
For parties or packed lunches, consider wrapping each oat cup in parchment paper tied with a colorful string for a charming, rustic touch. Alternatively, layer several in a mason jar with parchment between them for a portable snack stack that’s almost too pretty to eat.
Make Ahead and Storage
Storing Leftovers
Keep your No Bake Peanut Butter Oat Cups Recipe fresh by storing them in an airtight container in the refrigerator. They will stay delicious and firm for up to one week, making them an excellent option for meal prep or busy days.
Freezing
If you want to enjoy these treats over a longer period, they freeze beautifully. Just place the cups on a baking sheet to freeze individually before transferring to a freezer-safe container or bag. Frozen oat cups will keep their texture and flavor for up to two months.
Reheating
Since these oat cups are best enjoyed cold or at room temperature, there’s no need to reheat. If you prefer them slightly softened, simply let them sit at room temperature for 10 minutes before eating—perfectly mellow and ready to satisfy.
FAQs
Can I use almond butter instead of peanut butter?
Absolutely! Almond butter or even cashew butter can be swapped in for peanut butter without compromising the creaminess and binding properties. Expect a slightly different nutty flavor that’s just as delightful.
What if I’m allergic to nuts?
For nut allergies, sunflower seed butter or soy nut butter are excellent alternatives. They’ll still provide the necessary texture and richness needed for the oat cups to come together perfectly.
Are these cups gluten-free?
They can be if you use certified gluten-free oats, as oats themselves can sometimes be cross-contaminated with gluten. Always check your oat package labels if gluten is a concern.
Can I make these vegan?
Yes! Replace honey with maple syrup or agave nectar and ensure that the chocolate chips are dairy-free to keep this recipe completely vegan and still just as tasty.
How long do these oat cups last at room temperature?
Because of the coconut oil, it’s best to store these oat cups in the refrigerator. At room temperature, they may become too soft and lose their shape after a few hours, especially in warm weather.
Final Thoughts
This No Bake Peanut Butter Oat Cups Recipe is a star in my kitchen for all the times I want something quick, healthy, and unbelievably tasty. Once you taste them, I’m positive these little cups will become your go-to snack for busy days, sweet cravings, or anytime you need a burst of energy. So don’t wait—grab your ingredients and give these no-fuss, no-bake goodness a try today!
Print
No Bake Peanut Butter Oat Cups Recipe
- Prep Time: 10 minutes
- Cook Time: 0 minutes
- Total Time: 1 hour 10 minutes
- Yield: 12 cups
- Category: Snack
- Method: No-Cook
- Cuisine: American
- Diet: Vegetarian
Description
These No Bake Peanut Butter Oat Cups are a delicious and healthy snack made with natural peanut butter, rolled oats, honey, and chocolate chips. Perfect for a quick energy boost or a guilt-free treat, they require no baking and set firmly in the fridge for easy preparation.
Ingredients
Main Ingredients
- 2 cups old fashioned rolled oats
- 1 cup natural peanut butter
- 1/2 cup honey or maple syrup
- 1/4 cup melted coconut oil
- 1/2 teaspoon vanilla extract
- 1/4 teaspoon salt
Add-ins
- 1/2 cup mini chocolate chips
- 1/4 cup chopped peanuts (optional)
Instructions
- Prepare the Muffin Tin: Line a 12-cup muffin tin with paper liners or lightly grease it to prevent sticking.
- Mix Wet Ingredients: In a large mixing bowl, combine the natural peanut butter, honey (or maple syrup), melted coconut oil, vanilla extract, and salt. Stir until the mixture is smooth and well blended.
- Add Oats: Stir in the old fashioned rolled oats, mixing thoroughly until all the oats are fully coated with the wet ingredients.
- Fold in Add-ins: Gently fold in the mini chocolate chips and chopped peanuts if using, ensuring an even distribution through the mixture.
- Fill the Muffin Cups: Evenly divide the mixture among the prepared muffin cups. Use the back of a spoon to firmly press down and compact the mixture in each cup.
- Chill to Set: Place the muffin tin in the refrigerator and let the cups chill for at least 1 hour or until they are firm and set.
- Serve and Store: Once set, remove the cups from the liners and store them in an airtight container in the refrigerator to keep fresh.
Notes
- You can substitute almond butter or cashew butter for peanut butter to vary the flavor.
- For a dairy-free option, ensure the chocolate chips used are dairy-free.
- These peanut butter oat cups can be stored in the refrigerator for up to 1 week or frozen for up to 2 months.

