
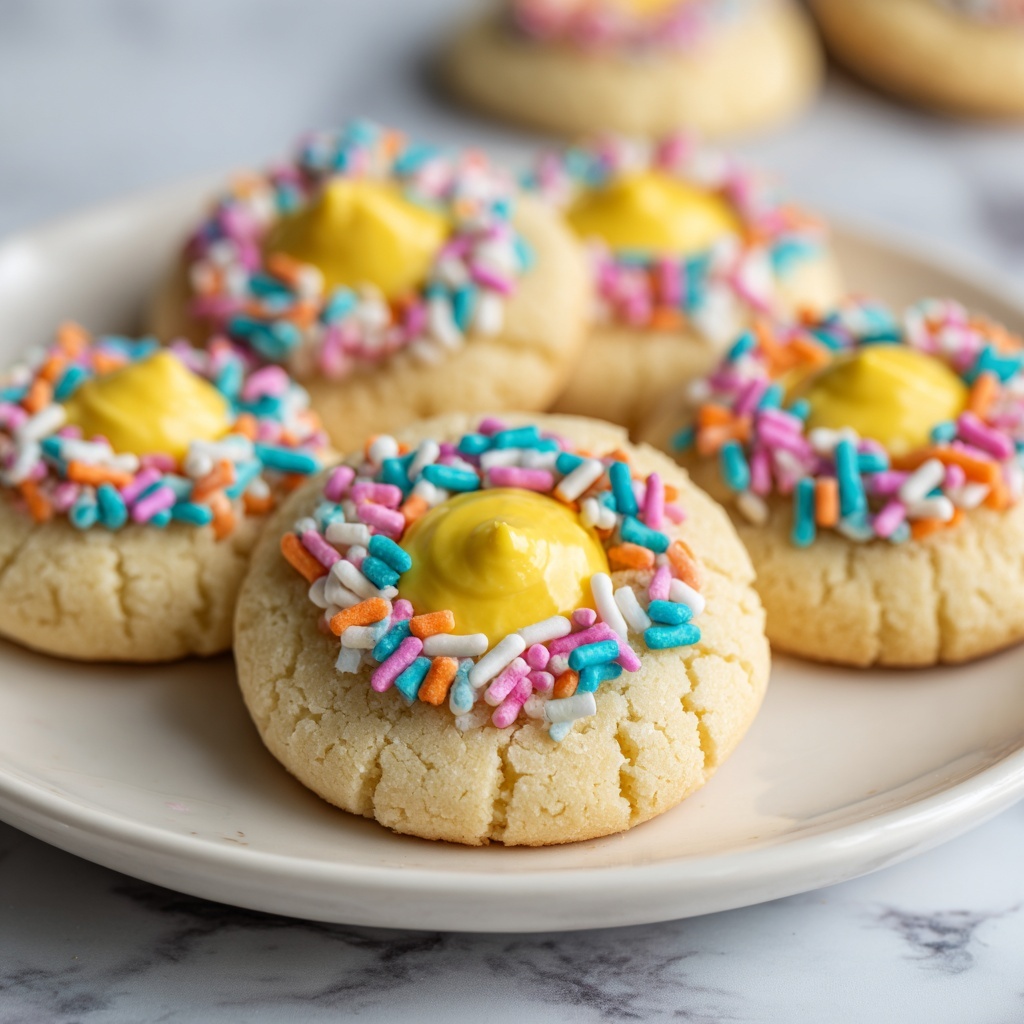
If you are looking to sweeten your Easter celebrations with something truly delightful and charming, this Easter Thumbprint Cookies Recipe is your new best friend. Imagine buttery, melt-in-your-mouth cookie bases adorned with vibrant Easter sprinkles and colorful candy melts that bring the festive spirit right to your dessert table. These cookies aren’t just pretty—they’re irresistibly delicious, boasting a perfect balance of sweet creaminess and playful textures that both kids and adults will adore. The Easter Thumbprint Cookies Recipe combines simplicity with creativity, making it an ideal treat to bake as a joyful family activity or to impress guests during this special holiday season.
Ingredients You’ll Need
The magic of these Easter Thumbprint Cookies Recipe starts with a handful of straightforward, pantry-friendly ingredients. Each one plays a crucial role in creating that tender texture, rich flavor, and eye-catching look that makes these cookies stand out.
- 1 1/4 cups flour: The foundation of the cookie dough, providing structure and a delicate crumb.
- 1/4 tsp kosher salt: Enhances the sweetness and balances the flavors perfectly.
- 1/2 cup unsalted butter: Adds richness and creates a tender, melt-in-your-mouth texture.
- 1/2 cup powdered sugar: Sweetens the cookies smoothly without any grittiness.
- 1 tsp pure vanilla extract: Offers a warm, classic flavor that lifts the entire cookie.
- 2 tbsp heavy whipping cream: Keeps the dough moist and tender for the perfect bite.
- 2 cups Easter sprinkles: Adds cheerful color and a festive crunch to each cookie.
- Candy melts (yellow and pink): These melt beautifully to form a glossy, colorful filling for the thumbprints.
How to Make Easter Thumbprint Cookies Recipe
Step 1: Prepare the Dough
Start by mixing the flour and kosher salt in a bowl to ensure even distribution. In a separate bowl, cream the unsalted butter with the powdered sugar until light and fluffy. Then add the vanilla extract and heavy whipping cream to this mixture, blending until smooth. Gradually incorporate the flour mixture, combining just until the dough forms. It’s important to avoid overmixing to keep the cookies tender and soft.
Step 2: Shape the Cookies
Take spoonfuls of the dough and roll them into uniform balls. Place them evenly spaced on a parchment-lined baking sheet. Using your thumb or the back of a small spoon, gently press into the center of each ball to create a shallow well—this is where the magic filling will go later. Don’t worry if your thumbprints aren’t perfect; the charm lies in their homemade look.
Step 3: Bake to Golden Perfection
Pop the tray in a preheated oven at 350°F (175°C) for about 12 minutes or until the edges start turning a soft golden hue. The cookies will look slightly underbaked in the center but will firm up as they cool, remaining tender on the inside.
Step 4: Add Colorful Candy Melts
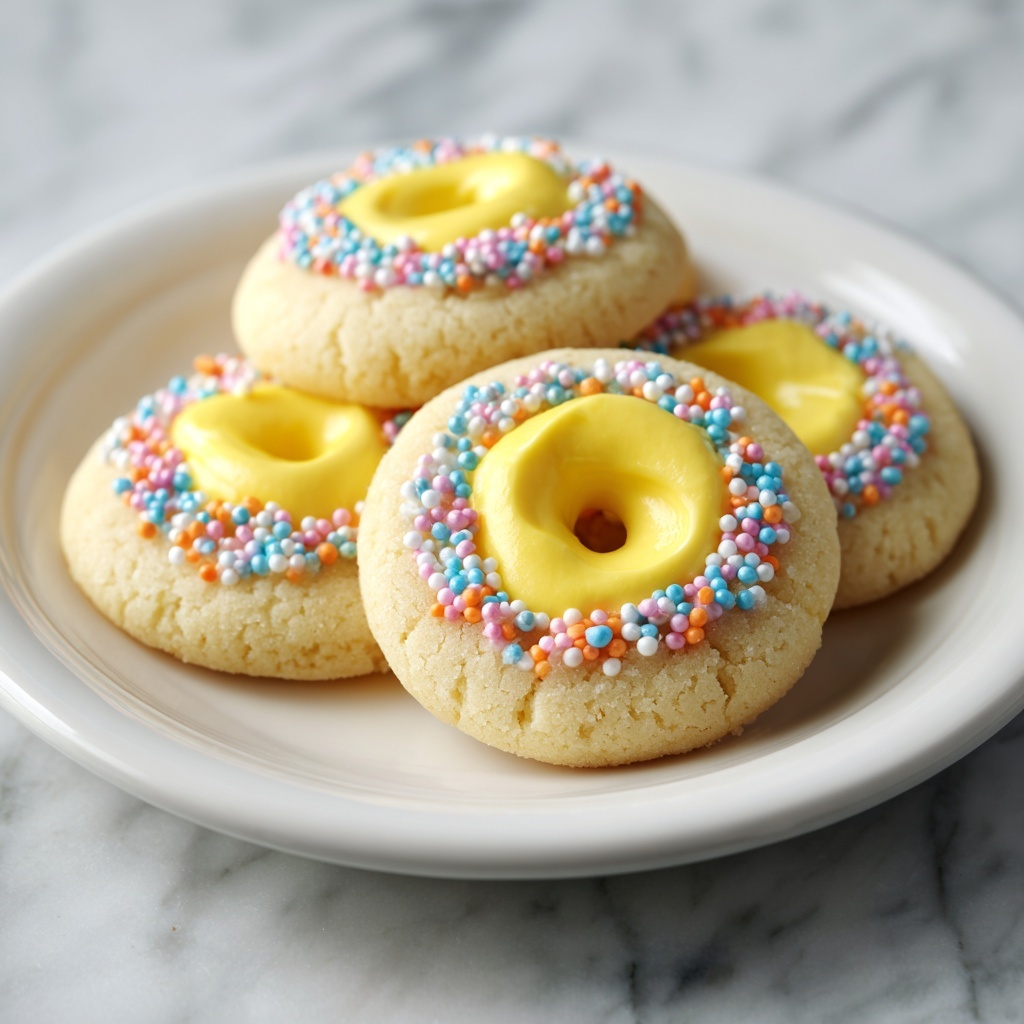
While the cookies are baking, gently melt the yellow and pink candy melts according to package instructions. Once the cookies have cooled for a few minutes, spoon or pipe the melted candy into each thumbprint indent. This not only adds a delightful sweetness but transforms these cookies into a festive Easter showstopper.
Step 5: Sprinkle the Finishing Touches
Finally, before the candy melts fully set, sprinkle the Easter sprinkles over the filled thumbprints. This adds both texture and a burst of vibrant Easter colors that scream celebration. Let the candy melts harden at room temperature for a few hours, or speed things up in the fridge if you prefer.
How to Serve Easter Thumbprint Cookies Recipe
Garnishes
Feel free to enhance your Easter Thumbprint Cookies Recipe by adding a dusting of powdered sugar over the top just before serving for a soft snow-like effect. Fresh edible flowers or tiny pastel-colored candies also work beautifully to amp up the charm and tie in with your Easter décor.
Side Dishes
These cookies pair wonderfully with a creamy hot chocolate or a calming chamomile tea to bring out their sweet vanilla notes. For a brunch spread, serve alongside a refreshing fruit salad or light citrus sorbet to balance the richness.
Creative Ways to Present
Presentation is key for making your Easter Thumbprint Cookies Recipe the centerpiece of your table. Arrange the cookies on a pastel-colored tiered dessert tray or nestle them in shredded paper grass inside cute Easter baskets. Wrapping them in cellophane with a ribbon makes adorable homemade gifts for neighbors and friends.
Make Ahead and Storage
Storing Leftovers
If you manage to keep any of these delightful cookies after the party, store them in an airtight container at room temperature for up to 4 days. This helps maintain their crisp edges and soft center without drying out the candy melts.
Freezing
To enjoy these treats even after the Easter season, freeze the cookies in a single layer on a baking sheet and then transfer them to a freezer-safe bag. They keep well for up to two months. When ready to enjoy, thaw them gently at room temperature, avoiding microwave reheating to preserve texture.
Reheating
Because these cookies are best enjoyed fresh, reheating should be minimal. If desired, you can warm them in a low oven (around 275°F) for 5 minutes, but avoid melting the candy melts further. This refreshes the cookie’s softness without compromising the festive top.
FAQs
Can I substitute the heavy whipping cream?
Yes! If you don’t have heavy whipping cream, you can use whole milk or half-and-half, though the texture might be slightly less rich. Avoid using skim milk, as it can make the dough too dry.
Are these cookies gluten-free?
This recipe calls for all-purpose flour, so it is not gluten-free. However, you can substitute with a gluten-free flour blend that measures cup-for-cup, making this recipe suitable for gluten-sensitive guests with a slightly different texture.
Can I use different candy melts colors?
Definitely! Feel free to mix and match your favorite colors to suit your Easter theme or personal preference. Purple, green, or blue candy melts can add a fun twist to this classic recipe.
How do I prevent the cookies from spreading too much?
Ensure your butter is cold and measured accurately. Chilling the dough for 30 minutes before baking can also help maintain the cookie’s shape and keep those perfect thumbprints intact.
Can these cookies be made vegan?
With some tweaks, yes! Use dairy-free butter and cream substitutes, as well as vegan-friendly candy melts and sprinkles. The texture might vary slightly, but the festive spirit will absolutely remain.
Final Thoughts
You truly cannot go wrong with this Easter Thumbprint Cookies Recipe; it brings together warm, buttery goodness and colorful fun in every bite. Whether you’re baking with little helpers or surprising a loved one, these cookies are sure to brighten the holiday and become a treasured tradition. So roll up your sleeves, grab those sprinkles, and let the Easter cookie magic begin!
Print
Easter Thumbprint Cookies Recipe
- Prep Time: 10 minutes
- Cook Time: 12-15 minutes
- Total Time: 22-25 minutes
- Yield: 22 cookies
- Category: Dessert
- Method: Baking
- Cuisine: American
- Diet: Vegetarian
Description
These delightful Easter Thumbprint Cookies are a festive and colorful treat perfect for spring celebrations. Soft, buttery cookies are filled with candy melts and decorated with vibrant Easter sprinkles, making them a fun and tasty addition to any holiday dessert table.
Ingredients
Dry Ingredients
- 1 1/4 cup all-purpose flour
- 1/4 tsp kosher salt
Wet Ingredients
- 1/2 cup unsalted butter, softened
- 1/2 cup powdered sugar
- 1 tsp pure vanilla extract
- 2 tbsp heavy whipping cream
Decorations
- 2 cups Easter sprinkles
- Candy melts (yellow and pink), for filling and decoration
Instructions
- Prepare the dough: In a mixing bowl, cream together the softened unsalted butter and powdered sugar until light and fluffy. Add the vanilla extract and heavy whipping cream, beating to combine. Gradually incorporate the all-purpose flour and kosher salt, mixing until a smooth dough forms.
- Shape the cookies: Preheat your oven to 350°F (175°C). Roll dough into 1-inch balls and place them on a baking sheet lined with parchment paper, spacing them about 2 inches apart.
- Create thumbprints: Using your thumb or the back of a small spoon, gently press into the center of each dough ball to create an indentation for filling.
- Add candy melt filling: Melt the yellow and pink candy melts according to package instructions. Spoon a small amount of melted candy melt into each indentation, filling the thumbprint well.
- Decorate with sprinkles: Immediately after filling, sprinkle Easter sprinkles over the candy-filled thumbprints so they stick and provide colorful decoration.
- Bake the cookies: Place the baking sheet in the preheated oven and bake for about 12-15 minutes, or until the edges are lightly golden and the candy melts have set.
- Cool and serve: Remove cookies from the oven and allow them to cool on the baking sheet for 5 minutes before transferring to a wire rack to cool completely. Enjoy your festive Easter Thumbprint Cookies!
Notes
- For best results, use room temperature butter so it creams easily.
- You can substitute candy melts with colored chocolate chips or jams if preferred.
- Be careful not to overfill the thumbprints to prevent candy from spilling during baking.
- Store cookies in an airtight container at room temperature for up to 5 days.
- These cookies can also be frozen before baking; thaw and bake as directed.


