
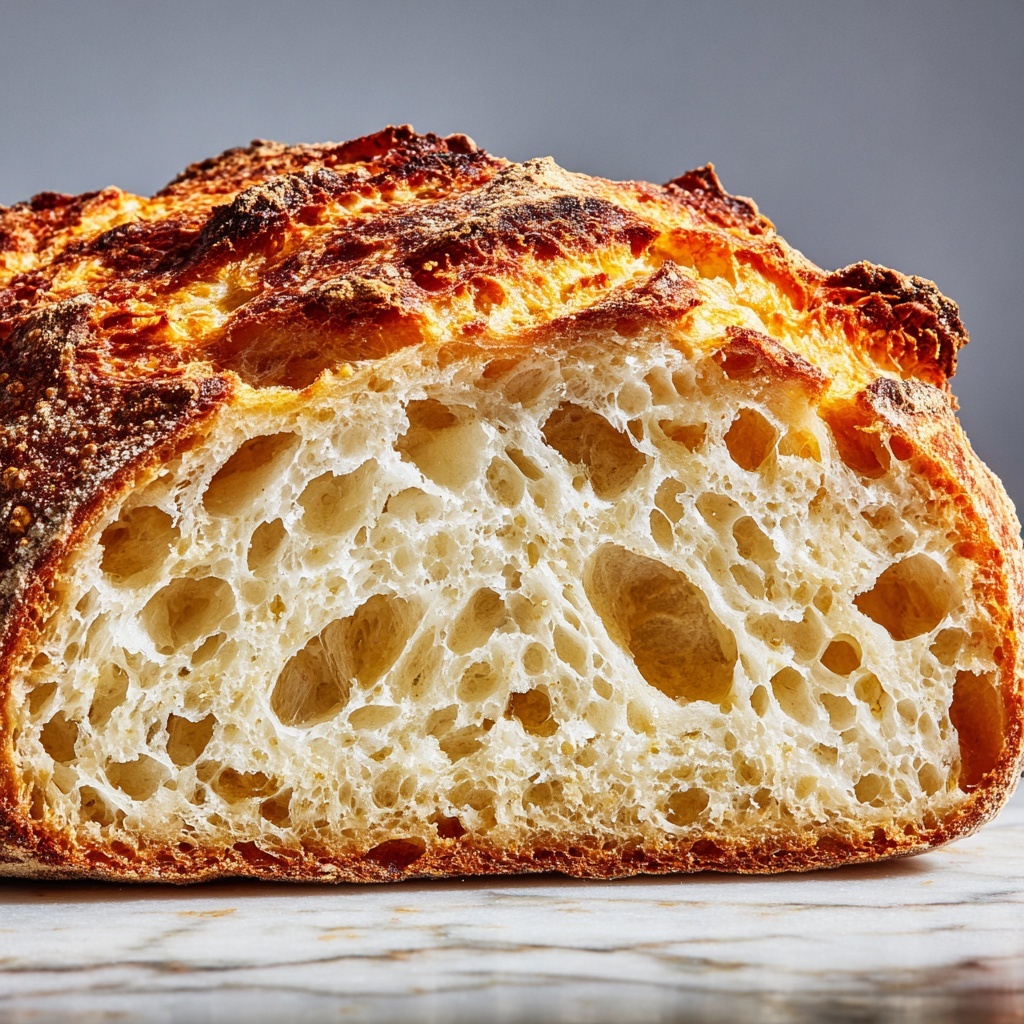
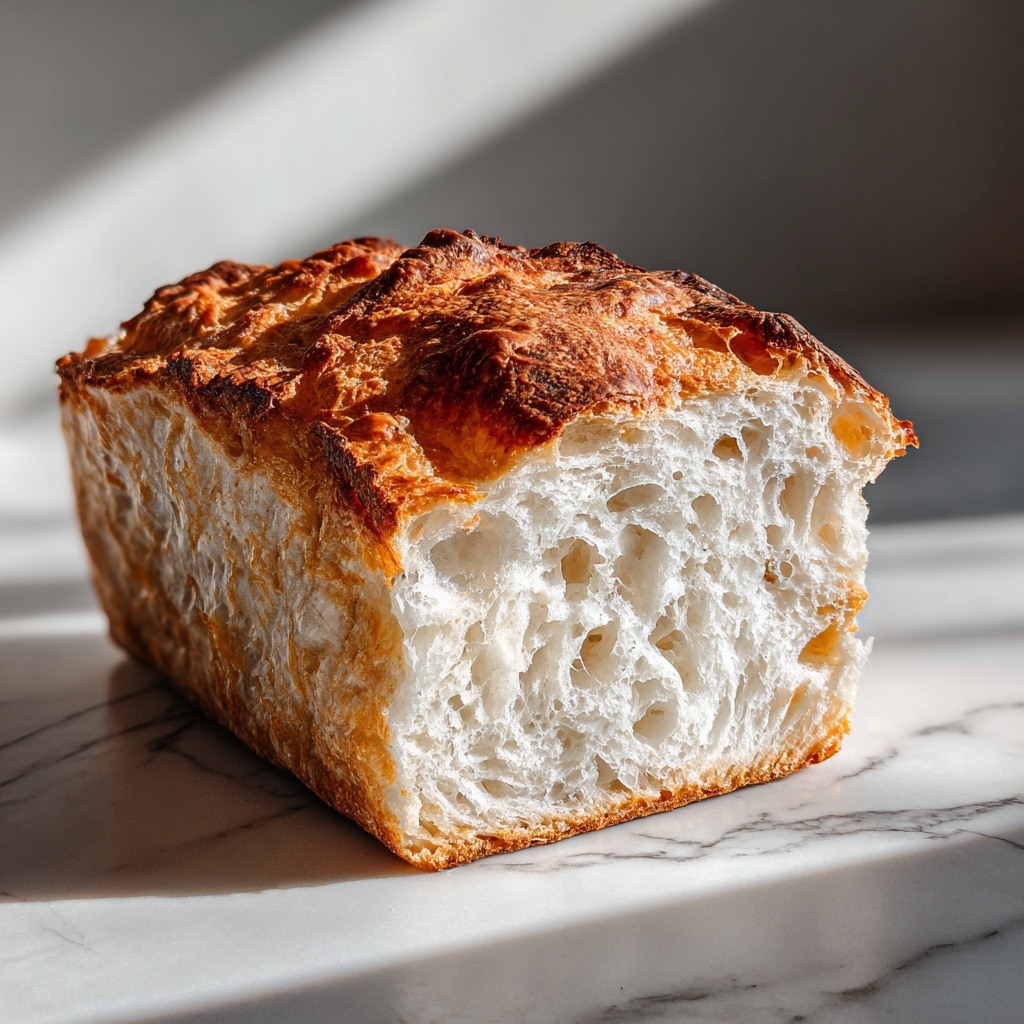
If you’ve been searching for a reliable, tasty, and soft loaf that fits perfectly into a gluten-free lifestyle, then you’re in for a real treat with this Classic Gluten-Free White Sandwich Bread Recipe. This bread delivers that perfect balance of a tender crumb and a golden crust, making it ideal for your daily sandwiches or toast. It’s straightforward enough for beginners but rewarding enough that even seasoned bakers will appreciate its delightful texture and flavor. Baking your own loaf with this recipe means saying goodbye to dry, crumbly gluten-free breads and welcoming a soft, fresh slice every time.
Ingredients You’ll Need
With just a handful of simple, essential ingredients, this recipe proves that good gluten-free bread doesn’t require a complicated ingredient list. Each item is thoughtfully chosen to contribute to the crumb’s softness, flavor, and beautiful color.
- Gluten-free all-purpose flour (2 cups): Provides the base structure and body of your bread.
- Sugar (1 tablespoon): Feeds the yeast and adds a touch of sweetness that enhances flavor.
- Salt (1 teaspoon): Balances the sweetness and strengthens dough flavor.
- Active dry yeast (1 tablespoon): The magical agent that helps your bread rise light and fluffy.
- Warm water (1 cup): Activates the yeast and hydrates the dough perfectly.
- Olive oil (2 tablespoons): Adds moisture and richness for a tender crumb.
- Eggs (2): Bind the ingredients together and improve the bread’s structure and softness.
How to Make Classic Gluten-Free White Sandwich Bread Recipe
Step 1: Prepare Your Oven and Pan
Start by preheating your oven to 375°F (190°C) to ensure it’s at the perfect temperature when your dough is ready. Meanwhile, grease your loaf pan generously to prevent sticking and help create a beautiful crust on your bread.
Step 2: Combine Dry Ingredients
In a large mixing bowl, whisk together the gluten-free all-purpose flour, sugar, salt, and active dry yeast. Mixing the dry ingredients first makes sure everything is evenly distributed, which helps your bread rise uniformly and develop great flavor.
Step 3: Add the Wet Ingredients and Form Dough
Next, pour in the warm water, olive oil, and eggs. Stir everything together until you achieve a smooth, cohesive dough. The warmth of the water wakes up the yeast, while the eggs and oil ensure your bread stays lovely and moist.
Step 4: Transfer Dough to Pan
Using a spatula, scoop your dough into the prepared loaf pan and smooth the surface. This step is important for a neat loaf shape and an even bake.
Step 5: Bake to Perfection
Bake the bread for about 40 minutes, or until the top turns a gorgeous golden brown and it sounds hollow when gently tapped. This hollow sound is the perfect sign that your bread is baked through without a gummy center.
Step 6: Cool Before Slicing
Allow the bread to rest in the pan for 10 minutes before removing it to a wire rack. Cooling it completely prevents the bread from becoming soggy and makes slicing easier, giving you those perfect sandwich-worthy slices.
How to Serve Classic Gluten-Free White Sandwich Bread Recipe
Garnishes
While this bread shines on its own, topping it with a thin spread of butter or a drizzle of honey elevates the experience. For a savory touch, sprinkle some finely chopped herbs on a dollop of cream cheese spread for a flavorful bite.
Side Dishes
This bread pairs wonderfully with fresh garden salads, hearty soups, or warm bowls of chili. Its mild flavor acts like the perfect canvas for bold, vibrant side dishes that make any meal more satisfying.
Creative Ways to Present
Turn your Classic Gluten-Free White Sandwich Bread Recipe into finger-friendly snacks by turning slices into mini sandwiches or toasts with gourmet toppings like avocado spread, smoked salmon, or even a colorful medley of roasted vegetables. Toasted and cubed, it makes excellent gluten-free croutons too!
Make Ahead and Storage
Storing Leftovers
After you’ve enjoyed your fresh loaf, wrap any leftovers tightly in plastic wrap or store in an airtight container. Kept at room temperature, your bread will stay moist and soft for up to three days.
Freezing
If you want to stock up, this bread freezes beautifully. Wrap it well in foil and place it in a freezer bag. Frozen bread will keep for up to three months without losing its wonderful texture and flavor.
Reheating
When you’re ready to enjoy your frozen loaf, simply thaw it at room temperature and reheat slices in a toaster or warm the entire loaf in the oven wrapped in foil to revive freshness and softness.
FAQs
Can I substitute eggs in the Classic Gluten-Free White Sandwich Bread Recipe?
Yes! You can replace each egg with a flax egg (1 tablespoon ground flaxseed mixed with 3 tablespoons water), which should be made ahead of time to thicken. This keeps your bread vegan-friendly while maintaining a similar texture.
Is this bread suitable for those avoiding dairy?
Absolutely. This recipe contains no dairy ingredients, so it’s safe for those who are lactose intolerant or following a dairy-free diet.
What is the best way to prevent gluten-free bread from being crumbly?
The eggs and olive oil in this Classic Gluten-Free White Sandwich Bread Recipe help provide moisture and structure, keeping crumbs to a minimum. Ensuring you mix the dough thoroughly and don’t overbake also helps maintain softness.
Can I use regular all-purpose flour instead of gluten-free?
While you could, this recipe is specifically balanced for gluten-free flours which behave differently. Using regular flour will change the texture and rising times, so use a traditional sandwich bread recipe designed for wheat flour if you’re not avoiding gluten.
Do I need a special gluten-free flour blend for this recipe?
A good quality gluten-free all-purpose flour blend, typically one that contains a mix of rice flour, tapioca starch, and xanthan gum, works best here. These blends mimic the behavior of wheat flour and give you the best results.
Final Thoughts
Baking this Classic Gluten-Free White Sandwich Bread Recipe is like giving yourself a little everyday luxury — fresh, homemade bread that fits your dietary needs and tastes absolutely delicious. It’s simple, rewarding, and opens the door to so many wonderful meals. I genuinely hope you give it a try and discover how easy and satisfying gluten-free baking can be.
Print
Classic Gluten-Free White Sandwich Bread Recipe
- Prep Time: 15 minutes
- Cook Time: 40 minutes
- Total Time: 55 minutes
- Yield: 1 loaf (about 8 slices)
- Category: Bread
- Method: Baking
- Cuisine: American
- Diet: Gluten Free
Description
This Classic White Sandwich Bread recipe offers a soft and fluffy loaf made with gluten-free all-purpose flour, perfect for those seeking a gluten-free alternative without compromising on texture or flavor. The bread is simple to prepare, requiring just basic ingredients and a single rise before baking to golden perfection.
Ingredients
Dry Ingredients
- 2 cups gluten-free all-purpose flour
- 1 tablespoon sugar
- 1 teaspoon salt
- 1 tablespoon active dry yeast
Wet Ingredients
- 1 cup warm water
- 2 tablespoons olive oil
- 2 eggs
Instructions
- Preheat Oven and Prepare Pan: Preheat your oven to 375°F (190°C). Grease a loaf pan thoroughly to prevent the dough from sticking.
- Combine Dry Ingredients: In a large mixing bowl, whisk together the gluten-free all-purpose flour, sugar, salt, and active dry yeast until evenly distributed.
- Add Wet Ingredients and Mix Dough: Pour in the warm water, olive oil, and eggs to the dry mixture. Stir and mix well until a smooth, but slightly sticky dough forms.
- Transfer Dough to Pan: Spoon the dough into the greased loaf pan and use a spatula to smooth the surface evenly for uniform baking.
- Bake the Bread: Place the loaf pan in the oven and bake for 40 minutes. The bread is done when the crust turns a golden brown color and sounds hollow when tapped gently.
- Cool the Bread: Remove the bread from the oven and let it cool in the pan for about 10 minutes. Then transfer the loaf to a wire rack to cool completely before slicing.
Notes
- Ensure the water is warm, not hot, to activate the yeast without killing it.
- Use gluten-free flour blends that contain xanthan gum or add it separately for better texture.
- Allow the bread to cool completely before slicing to prevent crumbling.
- Store bread in an airtight container or wrapped in plastic to maintain freshness.
- For a dairy-free version, ensure eggs are acceptable or substitute accordingly, as this recipe contains eggs and olive oil only.


