
Indulge yourself in the luscious delight of this Cherry Garcia Fudge Recipe, a dreamy blend of creamy chocolate, juicy cherries, and crunchy walnuts that marries flavor and texture in every bite. This recipe captures the spirit of the iconic Cherry Garcia ice cream, transforming it into a rich, decadent fudge that is perfect for gifting, sharing, or simply treating yourself on a cozy afternoon. Whether you’re a fudge enthusiast or looking for a show-stopping dessert to impress friends, this Cherry Garcia Fudge Recipe is a surefire way to bring smiles and satisfy sweet cravings.

Ingredients You’ll Need
The magic of this Cherry Garcia Fudge Recipe lies in its simplicity and the harmony of basic ingredients that each play a vital role. From the velvety chocolate chips that set the rich base to the bright bursts of chopped cherries and the satisfying crunch of walnuts, every component is essential for creating the perfect balance.
- 2 cups semi-sweet chocolate chips: These provide the smooth, creamy chocolate foundation that melts in your mouth.
- 1 can (14 oz) sweetened condensed milk: Adds luxurious sweetness and a velvety texture to the fudge.
- 1 tsp vanilla extract: Enhances the chocolate’s depth and rounds out the flavor.
- 1 cup chopped cherries: Bring juicy bursts of sweetness and the signature Cherry Garcia flavor.
- 1/2 cup chopped walnuts: Add a pleasing crunch and a subtle nutty contrast.
How to Make Cherry Garcia Fudge Recipe
Step 1: Prepare Your Pan
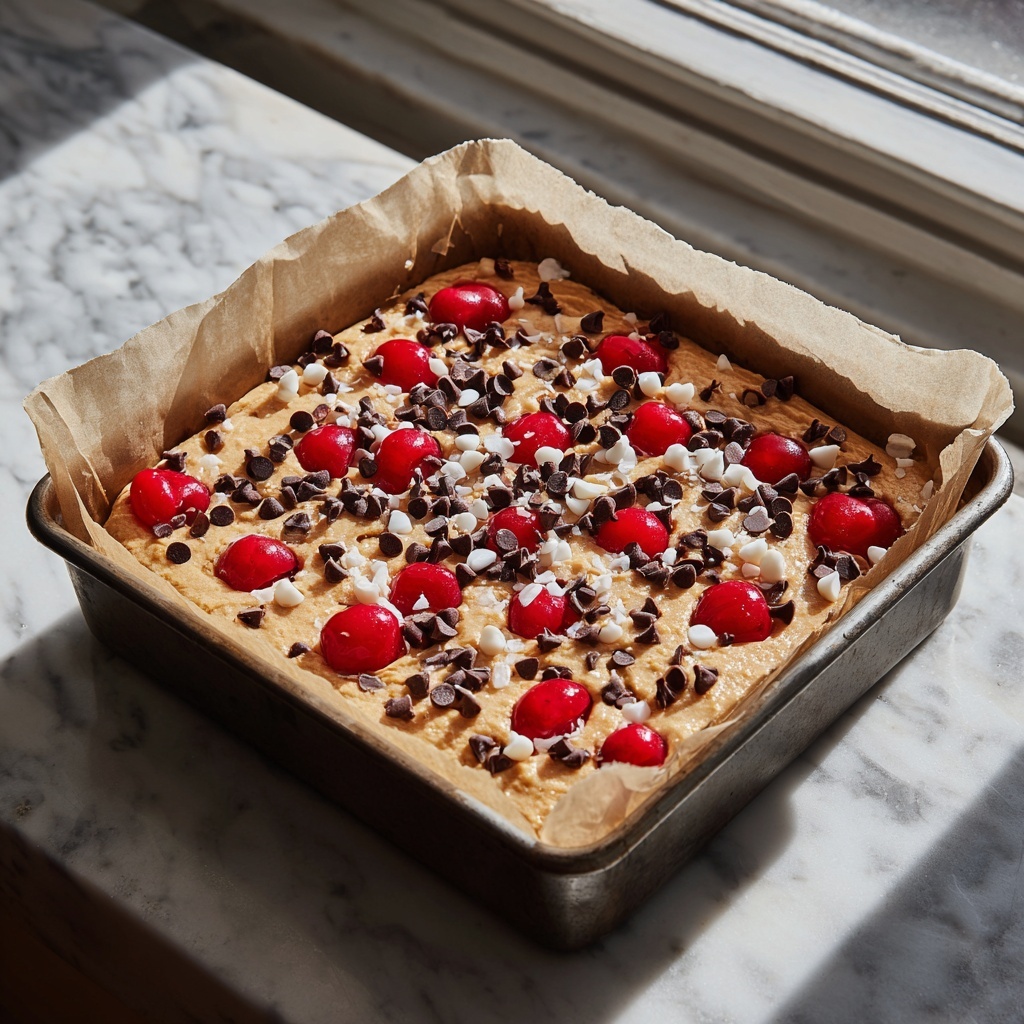
Start by lining an 8×8 inch pan with parchment paper. This simple step ensures your fudge releases cleanly and makes slicing easier—trust me, you want those perfect squares without a struggle.
Step 2: Melt the Chocolate and Sweetened Condensed Milk
In a microwave-safe bowl, combine the semi-sweet chocolate chips and sweetened condensed milk. Heat in 30-second intervals, stirring after each to encourage even melting and prevent burns. You’ll know it’s ready when the mixture is glossy and smooth — the key to silky fudge texture.
Step 3: Add Flavor and Texture
Once your chocolate base is soft and shiny, stir in the vanilla extract for an aromatic lift. Then fold in your chopped cherries and walnuts gently — this adds those delightful fruity pops and crunchy bites that make this fudge truly special.
Step 4: Set the Fudge
Pour the luscious mixture into the prepared pan and spread it evenly with a spatula. Pop it into the refrigerator for at least 2 hours to let it firm up. Watching it set feels almost as satisfying as eating it!
Step 5: Slice and Serve
After chilling, lift the fudge out using the parchment paper and cut it into squares. They’re perfect for sharing, gifting, or savoring one at a time while daydreaming about the next bite.
How to Serve Cherry Garcia Fudge Recipe
Garnishes
A sprinkle of extra chopped walnuts or a few whole cherries on top adds a festive touch and invites immediate indulgence. If you’re feeling fancy, a light dusting of powdered sugar or a drizzle of melted white chocolate can heighten both presentation and flavor.
Side Dishes
A scoop of vanilla ice cream or a cup of strong coffee serves as a perfect partner for your Cherry Garcia Fudge. The cold creaminess or the bitter contrast complements the fudge’s richness flawlessly, making your snack truly unforgettable.
Creative Ways to Present
Serve the fudge on a rustic wooden board with fresh cherries and walnuts arranged alongside for a charming dessert platter. You can also wrap individual squares in colorful parchment and tie with ribbon for cute edible gifts that wow every time.
Make Ahead and Storage
Storing Leftovers
Keep your Cherry Garcia Fudge Recipe airtight in the refrigerator to maintain its perfect texture and freshness. Stored properly, it stays delicious for up to two weeks, letting you savor it slowly or share over time.
Freezing
If you want to keep your fudge around longer, freezing is a fantastic option. Wrap it tightly in plastic wrap and place it in a freezer-safe container. It can last up to three months, so you’ll always have a sweet treat ready for unexpected guests or cravings.
Reheating
Fudge is best enjoyed cold or room temperature, but if you prefer a softer texture, let it sit out at room temperature for a bit before eating. Avoid microwaving as it can alter the texture and cause the fudge to become grainy.
FAQs
Can I use fresh cherries instead of chopped cherries for this recipe?
Absolutely! Fresh cherries work wonderfully if pitted and chopped finely. Just be sure to drain any excess juice to prevent the fudge from getting too soft.
Is it necessary to microwave the chocolate and condensed milk, or can I use a stovetop method?
While the microwave method is quick and convenient, you can gently melt the chocolate and condensed milk together in a double boiler on the stove. Just stir constantly to prevent scorching.
Can I substitute walnuts with another type of nut?
Yes! Pecans, almonds, or hazelnuts all make excellent substitutes if walnuts are not your favorite. Just chop them roughly for similar texture and flavor balance.
How long does the Cherry Garcia Fudge Recipe take to set properly?
Typically, chilling the fudge in the refrigerator for at least 2 hours is sufficient to achieve that perfect firm texture. For best results, avoid rushing this step.
Can I make this Cherry Garcia Fudge Recipe vegan or dairy-free?
You can try using dairy-free chocolate chips and a plant-based sweetened condensed milk alternative. Keep in mind that texture and flavor might vary slightly, but it can still be delicious!
Final Thoughts
This Cherry Garcia Fudge Recipe is one of those sweet creations that feels like a hug in dessert form. Rich, fruity, nutty, and undeniably satisfying, it’s bound to become a favorite treat whether for special occasions or everyday indulgence. I encourage you to make a batch and see just how joyful a little fudge can make your day.
Print
Cherry Garcia Fudge Recipe
- Prep Time: 10 minutes
- Cook Time: 1 minute (microwave melting)
- Total Time: 2 hours 11 minutes
- Yield: 12 servings
- Category: Dessert
- Method: No-Cook
- Cuisine: American
Description
Cherry Garcia Fudge is a rich and indulgent dessert featuring smooth semi-sweet chocolate blended with sweetened condensed milk, infused with vanilla, and studded with juicy chopped cherries and crunchy walnuts. This no-bake fudge is easy to prepare and perfect for satisfying your sweet tooth with a fruity twist.
Ingredients
Fudge Base
- 2 cups semi-sweet chocolate chips
- 1 can (14 oz) sweetened condensed milk
- 1 tsp vanilla extract
Add-ins
- 1 cup chopped cherries
- 1/2 cup chopped walnuts
Instructions
- Prepare Pan: Line an 8×8 inch pan with parchment paper to ensure easy removal of the fudge once set.
- Melt Chocolate Mixture: In a microwave-safe bowl, combine the semi-sweet chocolate chips and sweetened condensed milk. Microwave in 30-second intervals, stirring thoroughly between each interval until the mixture is completely smooth and well blended.
- Add Flavor and Texture: Stir in the vanilla extract for added aroma and flavor, then fold in the chopped cherries and walnuts evenly throughout the chocolate mixture.
- Pour Mixture: Pour the chocolate mixture into the prepared pan, spreading it out evenly to create a uniform layer.
- Chill: Refrigerate the fudge for at least 2 hours or until it is fully set and firm to the touch.
- Serve: Once set, lift the fudge out of the pan using the parchment paper, cut into squares, and serve.
Notes
- Use frozen cherries thawed and patted dry if fresh cherries aren’t available.
- For a nut-free version, omit walnuts or replace with chopped seeds.
- Ensure the chocolate mixture is fully melted and smooth for the best texture.
- Store fudge in an airtight container in the refrigerator to keep it fresh.
- Allow fudge to sit at room temperature a few minutes before serving for a softer bite.


