
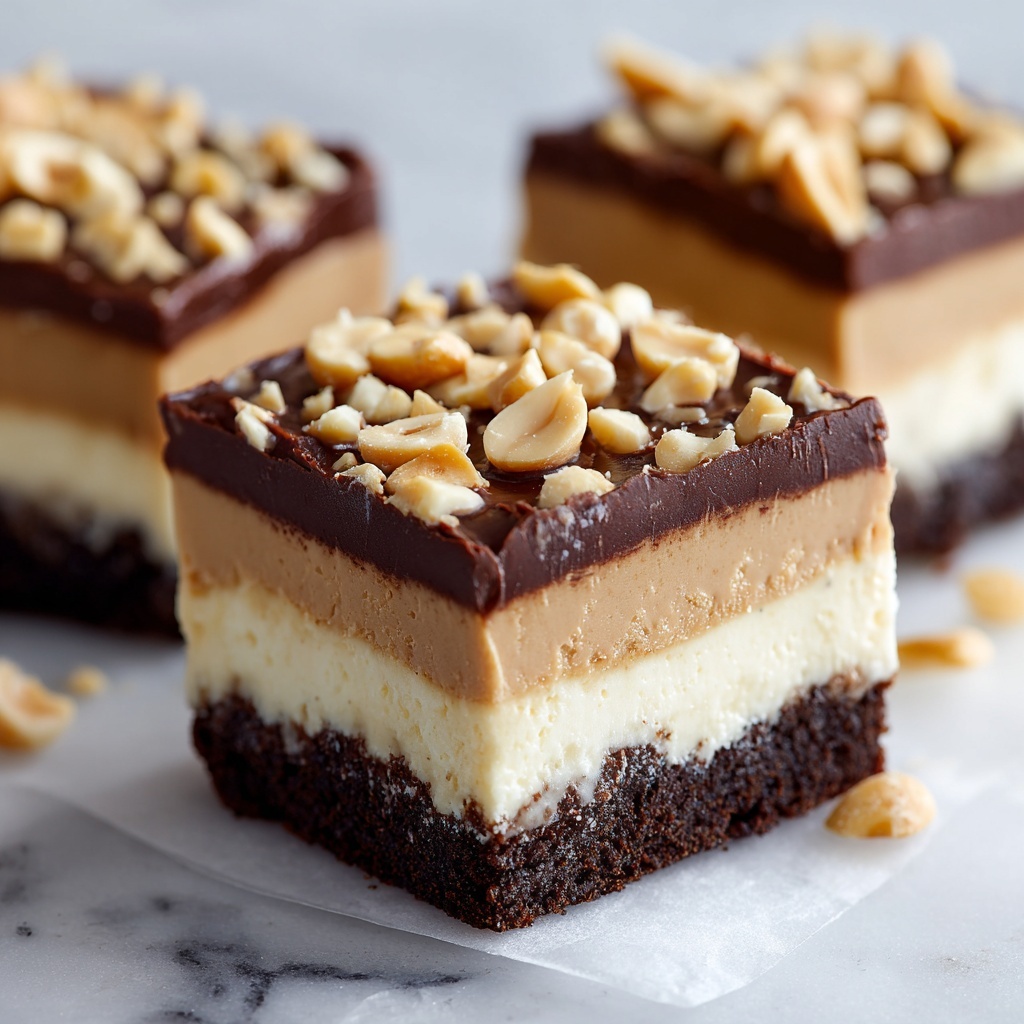
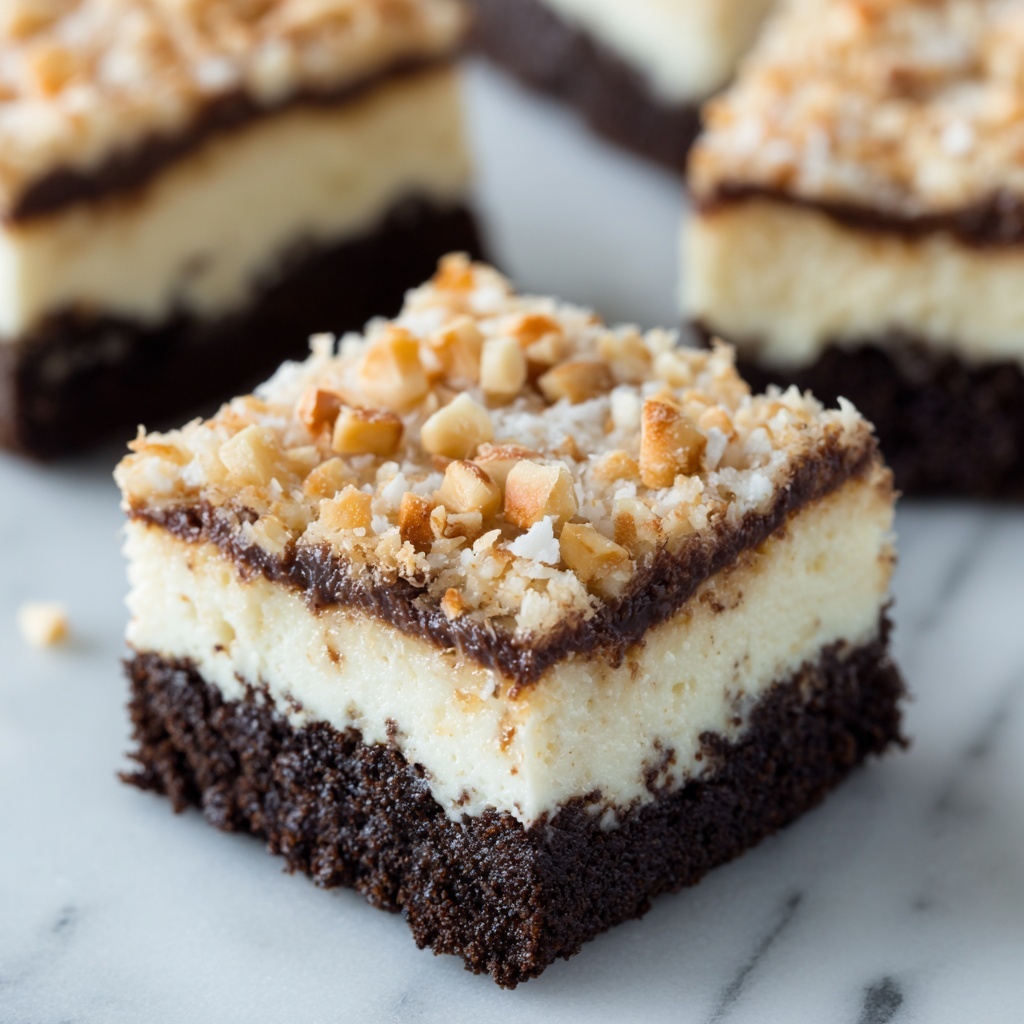
If you’ve ever dreamed of a dessert that combines the perfect balance of crunchy, creamy, and chocolatey, then this Peanut Butter Dream Bars Recipe is exactly what you need in your life. These bars are the ultimate treat: a buttery graham cracker crust, a luscious peanut butter filling, and a smooth chocolate topping all come together in one glorious bite. Whether you’re looking for an easy dessert to impress friends or simply craving a homemade indulgence, these bars will quickly become your new favorite way to satisfy that sweet tooth.
Ingredients You’ll Need
The magic of this Peanut Butter Dream Bars Recipe lies in its simple, yet essential ingredients. Each one brings a unique texture, flavor, or richness that makes these bars truly unforgettable.
- Graham cracker crumbs: Provide a buttery, slightly crunchy base that perfectly complements the creamy peanut butter.
- Granulated sugar: Adds the right amount of sweetness and helps balance the flavors.
- Unsalted butter (melted and softened): Creates a tender crust and smooth filling texture without overpowering the peanut butter.
- Creamy peanut butter: The star ingredient offering that rich, nutty flavor and creamy consistency.
- Powdered sugar: Sweetens and thickens the peanut butter filling to dreamy perfection.
- Vanilla extract: Enhances the overall flavor with warm, subtle notes.
- Heavy cream (or milk): Adds a silky smoothness to the filling and the chocolate topping.
- Semisweet chocolate chips: Bring a luscious, decadent finish that perfectly contrasts the peanut butter layer.
How to Make Peanut Butter Dream Bars Recipe
Step 1: Prepare the crust
Start by mixing the graham cracker crumbs, granulated sugar, and melted unsalted butter in a bowl. This blend forms the sturdy yet tender base that supports all the delicious layers to come.
Step 2: Press the crust
Press the crumb mixture firmly and evenly into the bottom of a lined baking pan. A uniform base ensures each bar has the perfect foundation without crumbling apart.
Step 3: Chill the crust
Pop the crust into the fridge to chill for about 10 minutes. This step helps it set and keeps it from mixing into the peanut butter filling later on.
Step 4: Mix the peanut butter filling
In a separate bowl, combine creamy peanut butter, powdered sugar, softened butter, and vanilla extract. Blend until smooth and creamy—this filling is the heart of the Peanut Butter Dream Bars Recipe.
Step 5: Add the cream
Slowly fold in the heavy cream (or milk) to create a fluffy, luscious layer that melts in your mouth. The cream lightens the dense peanut butter, making every bite dreamy.
Step 6: Spread the filling
Gently spread this creamy peanut butter mixture over the chilled crust, smoothing it out for even coverage.
Step 7: Melt the chocolate topping
In a small saucepan or microwave-safe bowl, melt the semisweet chocolate chips with the remaining butter until glossy and smooth. Stir frequently to prevent burning and ensure a silky finish.
Step 8: Spread the chocolate topping
Pour the melted chocolate over the peanut butter filling, carefully spreading it out to cover every inch. This chocolatey top adds a beautiful shine and irresistible flavor contrast.
Step 9: Chill the bars
Place the entire pan back into the fridge for at least an hour so the bars firm up completely. This chilling step guarantees clean slicing and delightful texture.
Step 10: Cut and serve
Once solid, remove the bars from the pan using the parchment edges, cut into squares, and get ready to indulge in your homemade Peanut Butter Dream Bars Recipe.
How to Serve Peanut Butter Dream Bars Recipe
Garnishes
A sprinkle of crushed peanuts or a light dusting of powdered sugar can add both charm and texture to your bars. For a festive touch, drizzle some melted white chocolate over the top or add a pinch of flaky sea salt to elevate the flavors.
Side Dishes
Serve these bars alongside a scoop of vanilla ice cream or a dollop of whipped cream for a complete dessert experience. Pairing them with fresh berries also adds a juicy, refreshing balance to the rich, nutty notes.
Creative Ways to Present
For a fun twist, create mini versions of these bars in cupcake liners for parties. Gift-wrapping them in cute boxes tied with ribbon makes a heartfelt homemade treat that anyone would appreciate. Layering the bars with alternating layers of whipped cream and crushed peanuts can also turn them into a stunning parfait-style dessert.
Make Ahead and Storage
Storing Leftovers
You can store any leftover Peanut Butter Dream Bars Recipe in an airtight container in the refrigerator for up to a week. Keeping them chilled preserves their texture and flavor beautifully.
Freezing
These bars freeze wonderfully. Wrap them tightly in plastic wrap and place in a freezer-safe container for up to three months. When ready to enjoy, thaw them overnight in the fridge for the best taste and consistency.
Reheating
These bars are best enjoyed cold or at room temperature, so reheating is usually unnecessary. If you prefer a softer texture, let them sit out at room temperature for 10 to 15 minutes before digging in.
FAQs
Can I use crunchy peanut butter instead of creamy?
Absolutely! Crunchy peanut butter will add extra texture, giving each bite a satisfying crunch along with the smooth layers.
Is there a substitute for graham cracker crumbs?
You can swap graham cracker crumbs for digestive biscuits or even crushed pretzels if you like a slightly salty contrast. Just make sure they’re finely crushed for the best crust texture.
Can I make this recipe vegan?
For a vegan twist, use dairy-free butter, plant-based milk instead of heavy cream, and vegan chocolate chips. The taste will still be deliciously rich!
How long do these bars last?
Stored properly in the fridge, these bars will stay fresh for about one week, making them perfect for meal prep or ahead-of-time treats.
What’s the best way to cut these bars cleanly?
Use a sharp knife warmed with hot water and wiped dry before slicing. This helps the chocolate top cut smoothly without cracking or sticking.
Final Thoughts
This Peanut Butter Dream Bars Recipe is one of those rare desserts that feels both indulgent and comforting at the same time. With every bite, you get a delightful mix of textures and flavors that come together perfectly. I can’t wait for you to make and enjoy these bars because they truly are a dream come true for any peanut butter lover. Trust me, once you try them, they’ll be requested again and again!
Print
Peanut Butter Dream Bars Recipe
- Prep Time: 10 minutes
- Cook Time: 0 minutes
- Total Time: 1 hour 10 minutes
- Yield: 16 servings
- Category: Dessert
- Method: No-Cook
- Cuisine: American
Description
Peanut Butter Dream Bars are a delicious no-bake dessert featuring a crunchy graham cracker crust, a creamy peanut butter filling, and a rich chocolate topping. Ready in just 15 minutes and perfect for sharing, these bars combine classic flavors in an easy-to-make treat that’s great for any occasion.
Ingredients
Crust
- 1 1/2 cups graham cracker crumbs
- 1/4 cup granulated sugar
- 1/2 cup unsalted butter, melted
Peanut Butter Filling
- 1 cup creamy peanut butter
- 1 cup powdered sugar
- 1/4 cup unsalted butter, softened
- 1 teaspoon vanilla extract
- 1/2 cup heavy cream (or milk)
Chocolate Topping
- 1 cup semisweet chocolate chips
- 2 tablespoons unsalted butter
Instructions
- Prepare the crust: In a mixing bowl, combine the graham cracker crumbs, granulated sugar, and melted butter. Stir well until the mixture resembles wet sand.
- Press the crust: Transfer the crust mixture into an 8×8-inch pan lined with parchment paper. Press firmly and evenly to form the base layer.
- Chill the crust: Place the pan in the refrigerator for about 10 minutes to set the crust.
- Mix the peanut butter filling: In a separate bowl, beat together the peanut butter, powdered sugar, softened butter, and vanilla extract until smooth and creamy.
- Add the cream: Slowly add the heavy cream (or milk) to the peanut butter mixture, beating until light and fluffy.
- Spread the filling: Evenly spread the peanut butter filling over the chilled crust layer, smoothing the top with a spatula.
- Melt the chocolate: In a microwave-safe bowl, melt the semisweet chocolate chips and butter together in 20-second intervals, stirring between each until fully melted and smooth.
- Spread the chocolate topping: Pour the melted chocolate over the peanut butter layer and spread evenly to cover.
- Chill the bars: Return the pan to the refrigerator and chill for at least 1 hour, or until the chocolate topping is firm.
- Cut and serve: Remove the bars from the pan using the parchment paper edges and cut into 16 squares. Serve chilled and enjoy!
Notes
- For a lighter texture, substitute heavy cream with whole milk.
- You can use crunchy peanut butter if you prefer added texture.
- Store bars in an airtight container in the refrigerator for up to 5 days.
- To soften cutting, allow bars to sit at room temperature for a few minutes.
- Double the recipe to make a larger batch for gatherings.
