If you’ve ever dreamed of the perfect sweet treat that brings together buttery oats, luscious caramel, and melty chocolate, you’re going to adore this Caramelitas Recipe. It’s a wonderful fusion of chewy and gooey textures wrapped in a golden oat crust, creating a dessert that’s both comforting and irresistibly delicious. Whether you’re baking for a casual get-together or just to satisfy a personal sweet tooth, these bars bring warmth and joy to every bite.
Ingredients You’ll Need
Gathering simple ingredients is the first step to creating this delightful treat. Each component plays its own role in building layers of flavor and texture, from the wholesome oats to the decadently smooth caramel topping.
- Rolled oats (1 cup): Adds hearty chew and a rustic texture that balances the sweetness perfectly.
- Melted butter (¾ cup): Brings richness and helps bind the oat mixture into a tender crust and topping.
- All-purpose flour (1 cup): Gives structure, creating that satisfying bite and golden finish.
- Brown sugar (¾ cup): Deep molasses flavor that sweetens and moistens the oat base.
- Baking soda (1 teaspoon): Just enough lift to lighten the oat crust without losing its chewy charm.
- Soft caramels (around 11 oz): The star of the show, melting into a luscious, buttery layer of caramel richness.
- Chocolate chips (1 cup): Adds a luscious bittersweet contrast that melts perfectly between layers.
- Heavy cream (½ cup): Creates a smooth, creamy caramel when combined with the soft caramels.
How to Make Caramelitas Recipe
Step 1: Prepare the Baking Pan
Start by greasing an 8×8-inch baking pan thoroughly to prevent sticking and preheat your oven to 350°F (175°C). This warm-up ensures your crust bakes evenly, laying the perfect foundation for your bars.
Step 2: Make the Caramel
Place the soft caramels and heavy cream in a small saucepan over medium heat. Stir continuously until the caramels melt completely into a smooth, creamy liquid. This rich caramel will soon become the irresistible gooey centerpiece of your bars. Set it aside carefully so it doesn’t thicken too much before layering.
Step 3: Make the Oat Mixture
In a mixing bowl, combine melted butter, brown sugar, all-purpose flour, rolled oats, and baking soda. Stir everything thoroughly until the mixture becomes a cohesive blend. This is your base and topping mixture, which will bake up into a golden, chewy, slightly crispy texture that you’ll love.
Step 4: Press the Base
Take half of the oat mixture and press it firmly into the bottom of your prepared pan. This step packs the flavor and texture foundation for the layers that follow, so take your time spreading it evenly.
Step 5: Bake the Crust
Pop the crust into the oven and bake it for 10 minutes until it’s just starting to set and take on a lovely golden hue. Then remove it carefully to prepare the next layers without overbaking.
Step 6: Add Chocolate Chips and Caramel
Sprinkle the chocolate chips evenly over the warm crust, then pour the smooth caramel mixture over the top. The heat from the crust softens the chocolate just enough, creating a dreamy blend that will ooze through every bite.
Step 7: Add the Top Layer
Spread the remaining oat mixture over the caramel-topped layer, pressing gently to hold everything together without disturbing the gooey middle. This will create a beautifully textured top that crisps up in the oven.
Step 8: Bake the Bars
Return the pan to the oven and bake for another 20 minutes. The top should turn a tempting golden brown, signaling that your Caramelitas are ready to delight. This final bake melds all the flavors into one glorious, caramel-studded bar.
Step 9: Cool and Serve
Allow the bars to cool completely in the pan. This step is crucial because cutting the bars too soon can cause the gooey caramel to spill. Once cool, slice into squares and prepare for happy smiles.
How to Serve Caramelitas Recipe

Garnishes
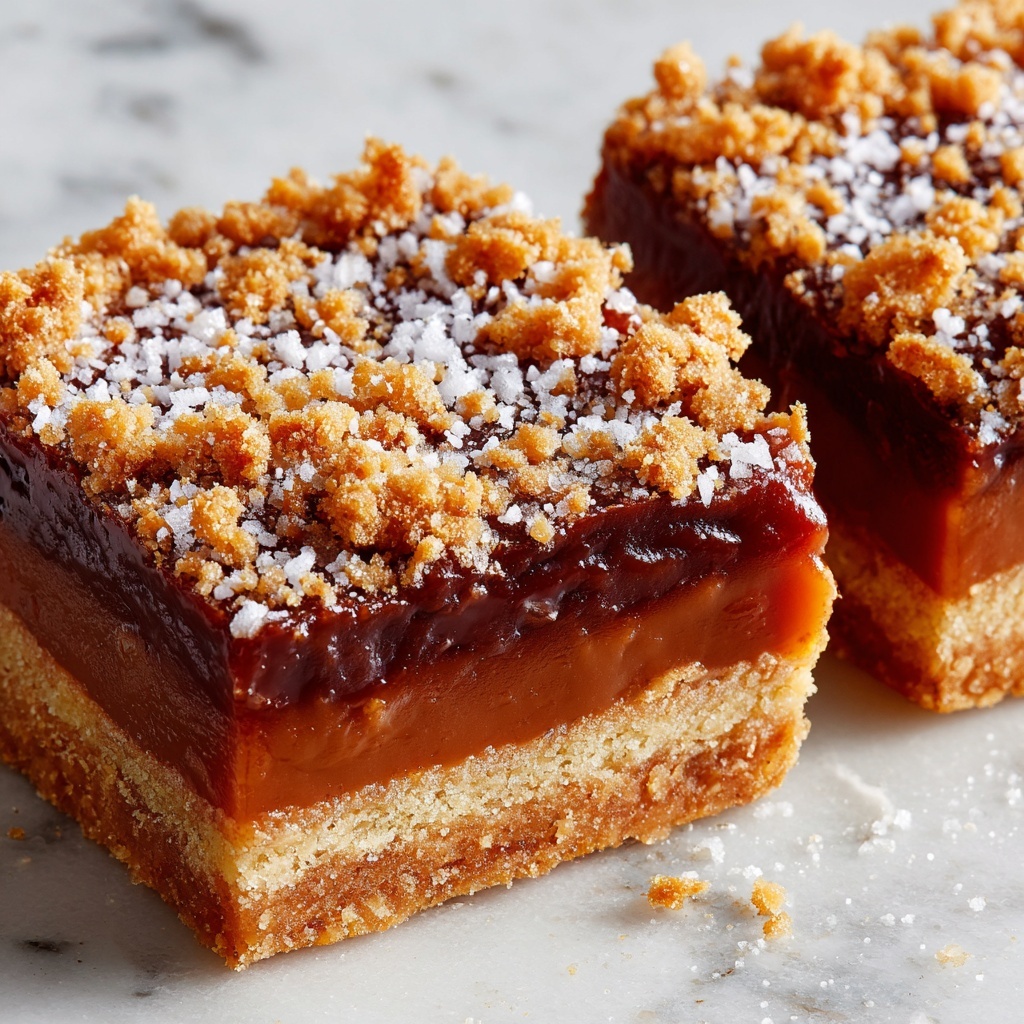
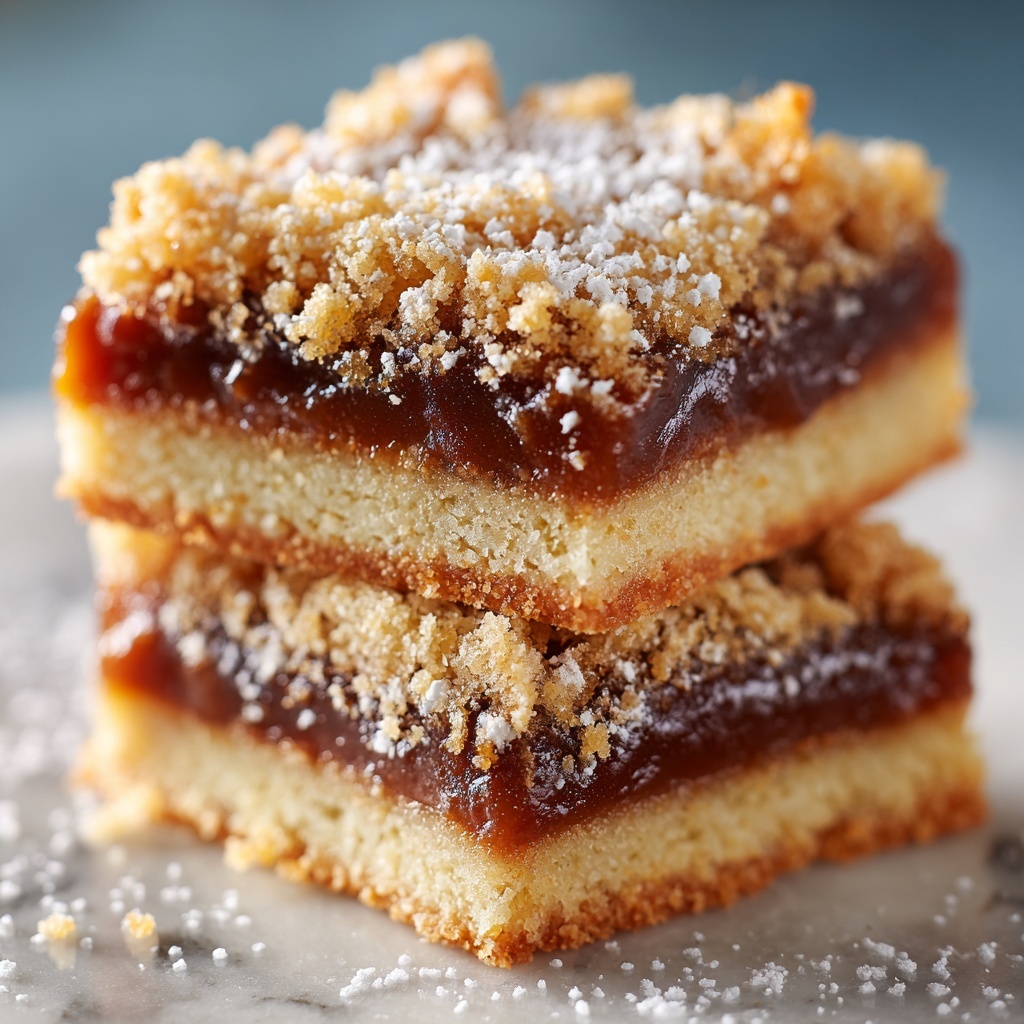
If you want to add a little extra flair, dust the tops lightly with powdered sugar or sprinkle a few flaky sea salt crystals to contrast the sweet caramel. For an elegant touch, add a dollop of whipped cream or a scoop of vanilla ice cream that melts into the warm bars beautifully.
Side Dishes
Caramelitas pair wonderfully with hot coffee or tea, providing a sweet pick-me-up any time of day. For brunch, serve alongside fresh fruit to balance the richness with natural freshness. A glass of cold milk is a classic match that never fails.
Creative Ways to Present
Try layering these bars with vanilla or caramel ice cream in a dessert parfait glass for a sophisticated presentation. Alternatively, create smaller bite-sized versions for parties or pack them individually for an irresistible homemade gift.
Make Ahead and Storage
Storing Leftovers
Store leftover caramelitas in an airtight container at room temperature for up to 3 days, or refrigerate to extend freshness up to a week. The flavors actually develop more with time, so they become even more delightful the next day.
Freezing
These bars freeze beautifully. Just wrap them tightly in plastic wrap and place them in a freezer-safe container or bag. They can be frozen for up to 3 months without losing their delicious texture or taste.
Reheating
When you’re ready to enjoy leftovers, gently warm the bars in a microwave or a low oven to revive the gooey caramel and soften the chocolate once again. Just a few seconds will bring back that fresh-baked magic.
FAQs
Can I use different types of chocolate chips in the Caramelitas Recipe?
Absolutely! Semi-sweet, milk, or even white chocolate chips can work, depending on your taste preference. Each type adds its own unique flavor dimension, so feel free to experiment.
Is it possible to make the Caramelitas gluten-free?
Yes! Simply substitute the all-purpose flour with a gluten-free flour blend suitable for baking. Make sure your oats are certified gluten-free to avoid any cross-contamination.
Can I prepare the caramel layer in advance?
Yes, you can make the caramel layer up to a day ahead and store it in the refrigerator. Reheat gently on the stove over low heat before pouring it onto the crust for best results.
What’s the best way to cut the bars without making a mess?
Let the bars cool completely before cutting. Use a sharp knife and wipe it clean between cuts to keep the layers neat and prevent the caramel from sticking to the blade.
Can I add nuts or other mix-ins to the Caramelitas?
Definitely! Chopped pecans, walnuts, or even toasted coconut bodies add fantastic crunch and flavor variation. Just sprinkle them over the chocolate chips before pouring the caramel.
Final Thoughts
There is something truly magical about a homemade caramel bar that fills the kitchen with irresistible aromas and brings loved ones together to share a sweet moment. The Caramelitas Recipe delivers all that and more with its perfect balance of chewy oats, smooth caramel, and rich chocolate. I can’t wait for you to try it and make it a cherished staple in your baking repertoire.
Print
Caramelitas Recipe
- Prep Time: 10 minutes
- Cook Time: 30 minutes
- Total Time: 40 minutes
- Yield: 9 servings
- Category: Dessert
- Method: Baking
- Cuisine: American
Description
These Caramelitas are a deliciously chewy and gooey dessert bar featuring a buttery oat crust layered with melted caramel and rich chocolate chips. Baked to golden perfection, they combine the comforting flavors of caramel and chocolate with a satisfying oat texture, perfect for sharing at any gathering or enjoying as a sweet treat.
Ingredients
Base and Topping
- 1 cup rolled oats
- ¾ cup melted butter
- 1 cup all-purpose flour
- ¾ cup brown sugar
- 1 teaspoon baking soda
Caramel Layer
- 1 bag of soft caramels (around 11 oz)
- ½ cup heavy cream
- 1 cup chocolate chips
Instructions
- Prepare the Baking Pan: Grease an 8×8-inch baking pan thoroughly to prevent sticking, and preheat your oven to 350°F (175°C) to ensure it’s ready for baking.
- Make the Caramel: In a small saucepan over medium heat, combine the soft caramels and heavy cream. Stir continuously until the caramels have fully melted into a smooth, creamy caramel sauce. Remove from heat and set aside.
- Make the Oat Mixture: In a medium bowl, mix the melted butter, brown sugar, all-purpose flour, rolled oats, and baking soda until everything is evenly combined into a crumbly batter.
- Press the Base: Take half of the oat mixture and press it firmly and evenly into the bottom of the prepared baking pan, creating a solid crust layer.
- Bake the Crust: Place the pan in the preheated oven and bake for 10 minutes to set the crust. Once done, remove it from the oven and immediately sprinkle the chocolate chips evenly over the warm crust.
- Add the Caramel Layer: Pour the prepared caramel mixture evenly over the layer of chocolate chips, allowing it to spread out smoothly.
- Add the Top Layer: Spread the remaining oat mixture gently over the caramel layer, pressing lightly so it adheres but doesn’t press the layers too hard.
- Bake the Bars: Return the entire dish to the oven and bake for an additional 20 minutes or until the top layer turns a golden brown color, signaling that the bars are cooked through.
- Cool and Serve: Remove the caramelitas from the oven and allow them to cool completely in the pan before slicing into squares for serving.
Notes
- Ensure the caramel mixture is smooth before pouring over the bars to avoid clumps.
- Press oat mixture layers evenly for consistent baking and texture.
- Allow bars to cool fully for cleaner cuts and better texture.
- Store leftover bars in an airtight container at room temperature for up to 3 days.

