
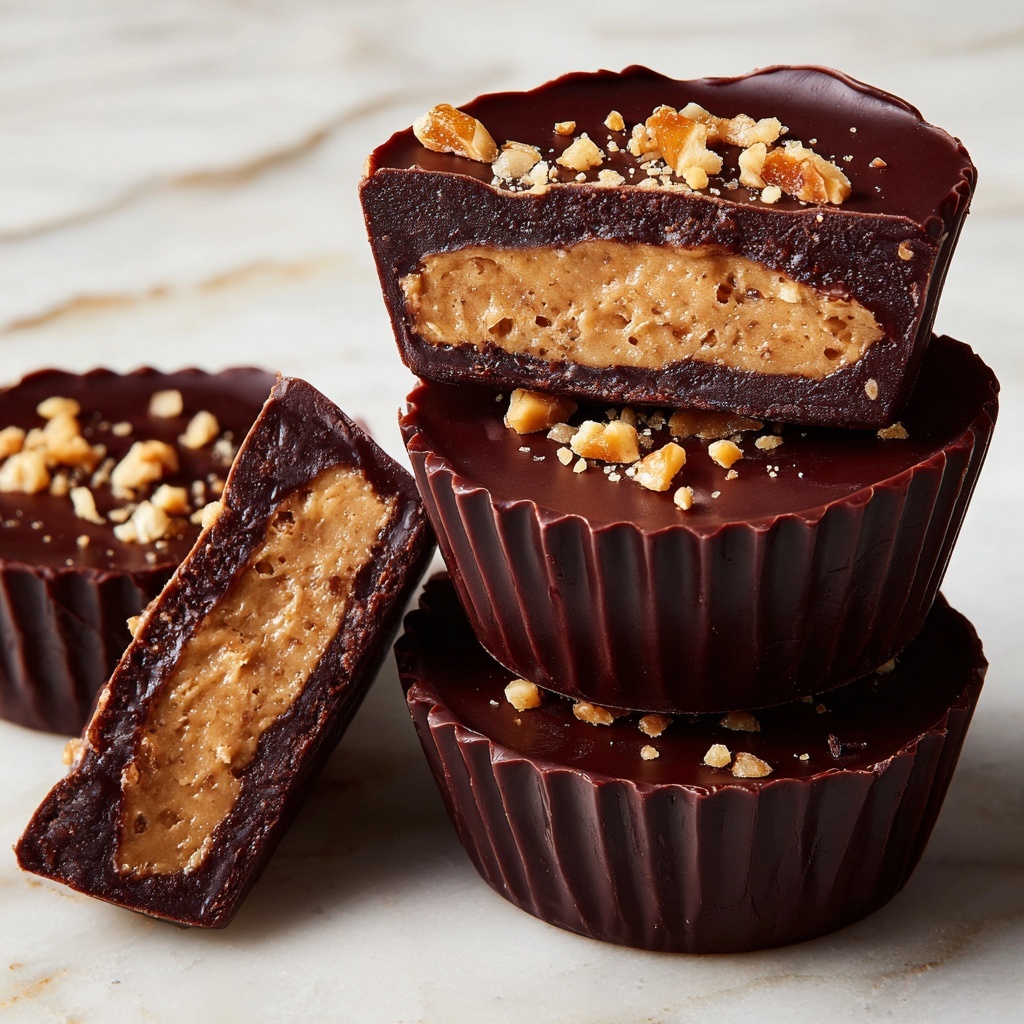
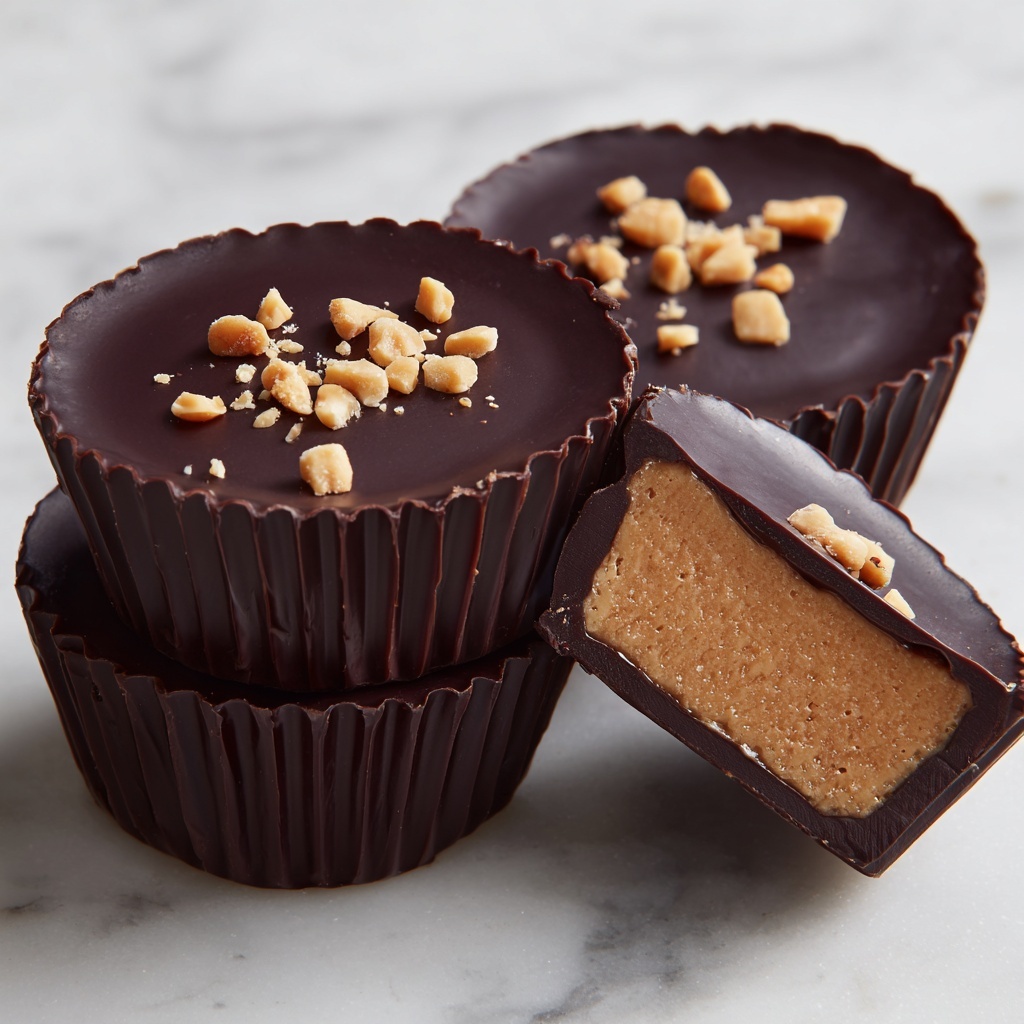
If you have a soft spot for that perfect blend of creamy peanut butter and rich chocolate, then you are in for a treat with this Homemade Reese’s Peanut Butter Cups Recipe. This delightful confection captures all the nostalgic flavors of classic Reese’s, but with a homemade charm that’s simply unbeatable. The balance of velvety chocolate and sweet, smooth peanut butter makes these cups an irresistible snack or gift that everyone will adore. Whether you’re looking to impress friends, satisfy a sweet craving, or whip up a fun project in the kitchen, this recipe is your golden ticket to peanut butter chocolate bliss.
Ingredients You’ll Need
Getting the ingredients right makes all the difference in this Homemade Reese’s Peanut Butter Cups Recipe. Each component plays a crucial role, from flavor to texture, ensuring every bite is just as dreamy as the last.
- 1 cup creamy peanut butter: Choose a smooth, creamy style for the perfect melt-in-your-mouth filling that’s both rich and luscious.
- 1/4 cup powdered sugar: Adds a subtle sweetness and helps firm up the peanut butter mixture for easy layering.
- 1/2 teaspoon vanilla extract: Brings a warm, fragrant note that enhances the peanut butter’s natural taste.
- 1 1/2 cups chocolate chips: Use semi-sweet or milk chocolate chips depending on your preference for the chocolate coating that envelops the peanut butter perfectly.
- Optional: 1/4 cup chopped peanuts: Adds a delightful crunch and extra peanut flavor when sprinkled on top.
How to Make Homemade Reese’s Peanut Butter Cups Recipe
Step 1: Prepare the Peanut Butter Filling
Start by whisking together the creamy peanut butter, powdered sugar, and vanilla extract in a mixing bowl until the mixture is smooth and well combined. This silky filling is what makes your cups irresistibly creamy, so make sure it’s lump-free and ready to be layered.
Step 2: Melt the Chocolate
Next, gently melt your chocolate chips in a microwave-safe bowl, heating in 20-second bursts and stirring in between, or use a double boiler for a more controlled melt. The goal is to have silky, fully melted chocolate that’s perfect for coating without burning or seizing.
Step 3: Line Your Muffin Tin
Prepare a muffin tin by placing cupcake liners or silicone molds inside each cup. This helps everything hold shape beautifully and makes removing your peanut butter cups a breeze once set.
Step 4: Create the Chocolate Base
Pour a spoonful of melted chocolate into each liner, using the back of the spoon to spread it evenly to cover the bottom. This chocolate base forms a delicious shell that will lock in the peanut butter filling for the perfect bite.
Step 5: Add the Peanut Butter Layer
Once the chocolate base is set slightly (you can refrigerate it briefly if you want it firmer), dollop the peanut butter mixture on top. Spread it evenly to create a smooth layer that won’t spill over the edges when covered with more chocolate.
Step 6: Seal with Chocolate
Pour the remaining melted chocolate on top of the peanut butter layer, making sure to completely cover and seal in the filling. This step is key for that iconic two-layer look and ensures your cups hold together firmly.
Step 7: Add Toppings and Chill
If you’re feeling extra crunchy, sprinkle chopped peanuts on top before the chocolate sets. Then, pop the tray into the refrigerator for about 30 minutes until the cups are fully firmed up and ready to enjoy.
How to Serve Homemade Reese’s Peanut Butter Cups Recipe
Garnishes
Simplify your presentation with a light dusting of cocoa powder or a drizzle of white chocolate for contrast. Adding a few extra chopped peanuts on top just before serving also makes these treats look as inviting as they taste.
Side Dishes
These peanut butter cups pair wonderfully with vanilla ice cream or a cold glass of milk. If you want to get adventurous, serve alongside fresh berries to add a refreshing burst of flavor that complements the richness.
Creative Ways to Present
For gift-giving or parties, arrange your Homemade Reese’s Peanut Butter Cups Recipe on a decorative platter lined with parchment paper. You can even wrap individual cups in colorful cellophane tied with a ribbon to make them extra special and festive.
Make Ahead and Storage
Storing Leftovers
Store any leftover peanut butter cups in an airtight container in the refrigerator. They’ll stay fresh and firm for up to one week, giving you plenty of time to sneak another or share with family and friends.
Freezing
If you want to keep them longer, these treats freeze beautifully. Place them in a single layer on a baking sheet to freeze first, then transfer to a freezer-safe container or bag. They’ll keep for up to three months and thaw quickly when needed.
Reheating
Since these cups are meant to be enjoyed cold and firm, there’s no need to reheat. Let frozen cups thaw in the refrigerator instead of at room temperature to keep their shape and texture intact.
FAQs
Can I use crunchy peanut butter instead of creamy?
You can definitely swap in crunchy peanut butter, but it will change the texture slightly. The peanut chunks add extra crunch which some people love, but the filling might be a bit less smooth.
What type of chocolate is best for this recipe?
Semi-sweet chocolate chips strike the perfect balance of sweetness and richness, but milk chocolate works well too if you prefer a sweeter, creamier coating. Dark chocolate is an option if you want a more intense chocolate flavor.
Do I need to refrigerate these peanut butter cups?
Yes, refrigeration helps set the chocolate and firm up the peanut butter filling. While they can be left at room temperature for a short while, keeping them chilled is best for texture and freshness.
Can I make these peanut butter cups vegan?
Absolutely! Use dairy-free chocolate chips and ensure your peanut butter is vegan-friendly. This recipe is easily adaptable for a vegan diet without sacrificing any of the deliciousness.
How long does it take to make these from start to finish?
This recipe comes together quickly, with about 10 minutes of prep and mixing. The majority of the time is waiting for the chocolate to set in the fridge, generally around 30 minutes.
Final Thoughts
I wholeheartedly encourage you to try this Homemade Reese’s Peanut Butter Cups Recipe if you want a fun, satisfying, and utterly delicious treat that rivals store-bought versions. Not only is it simple to make, but the joy of enjoying something homemade with such classic flavors is genuinely special. Once you taste the perfect harmony of chocolate and peanut butter created here, I bet these cups will become one of your favorite go-to sweets to share and savor.
Print
Homemade Reese’s Peanut Butter Cups Recipe
- Prep Time: 10 minutes
- Cook Time: 0 minutes
- Total Time: 40 minutes
- Yield: 12 servings
- Category: Dessert
- Method: No-Cook
- Cuisine: American
- Diet: Vegetarian
Description
These Homemade Reese’s Peanut Butter Cups are a delightful treat combining creamy peanut butter and rich chocolate. Easy to make in just 10 minutes plus chilling time, these candy cups are perfect for satisfying your sweet tooth with a homemade twist.
Ingredients
Peanut Butter Filling
- 1 cup creamy peanut butter
- 1/4 cup powdered sugar
- 1/2 teaspoon vanilla extract
Chocolate Coating
- 1 1/2 cups chocolate chips
- Optional: 1/4 cup chopped peanuts for topping
Instructions
- Mix Peanut Butter Filling: In a mixing bowl, combine the creamy peanut butter, powdered sugar, and vanilla extract. Stir well until the mixture is smooth and evenly blended.
- Melt Chocolate: Melt the chocolate chips using a microwave-safe bowl or a double boiler. Heat in short intervals, stirring in between, until the chocolate is fully melted and smooth.
- Prepare Muffin Tin: Line a muffin tin with cupcake liners or silicone molds to prevent sticking and make removal easy.
- Pour Chocolate Base: Spoon melted chocolate into each lined cup, covering the bottom completely. Spread evenly to create a chocolate base layer.
- Add Peanut Butter Layer: Place a spoonful of the peanut butter mixture on top of the chocolate base in each cup. Spread it evenly to cover the chocolate.
- Seal with Chocolate: Cover the peanut butter layer with more melted chocolate, ensuring it fully seals the peanut butter inside.
- Add Optional Topping: If desired, sprinkle chopped peanuts on top of each cup for added texture and flavor.
- Chill: Refrigerate the peanut butter cups for about 30 minutes or until the chocolate is firm and set.
Notes
- Use creamy peanut butter for a smooth texture; crunchy peanut butter can be used for added crunch.
- Ensure the chocolate is not overheated to prevent burning and seizing.
- Line muffin tins with silicone molds for easy removal without breaking the cups.
- Store the peanut butter cups in an airtight container in the refrigerator to keep them fresh.
- You can substitute chocolate chips with any chocolate of your choice (milk, dark, or semi-sweet).
