
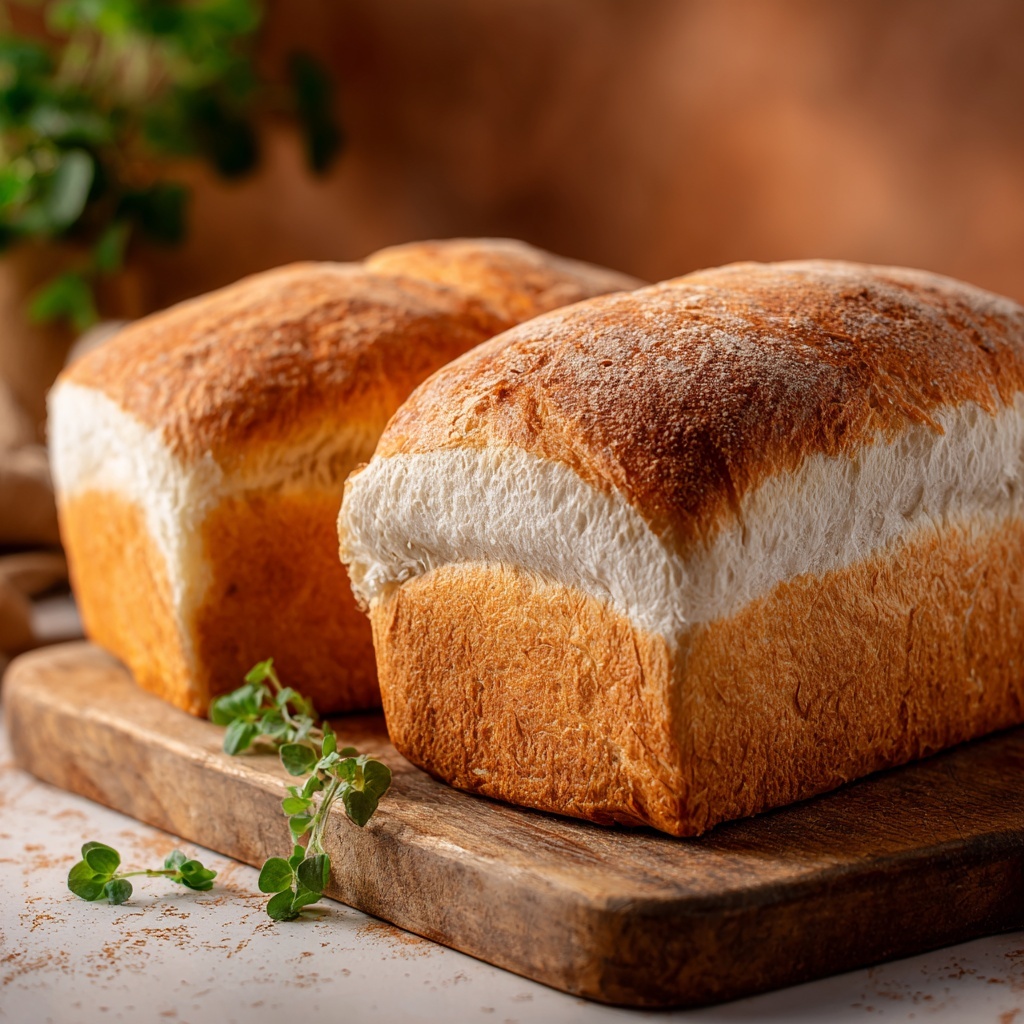
There’s something truly magical about fresh homemade bread, and with The Only Bread Recipe You’ll Ever Need Recipe, you get that perfect crust, tender crumb, and just the right flavor with minimal fuss. This recipe is a game-changer for anyone who loves baking or simply wants a loaf they can rely on for sandwiches, toast, or just eating plain. From the moment you mix the dough to the aroma wafting out of the oven, you’ll realize this truly might be the only bread recipe you’ll ever want to reach for again.
Ingredients You’ll Need
Ingredients You’ll Need
These ingredients are wonderfully simple but essential; each one plays a crucial role in delivering the perfect loaf. From flour providing the structure, to yeast activating the magic of rising, every component is a part of the harmony that creates this delicious bread.
- 3 cups all-purpose flour: The base of your dough, it gives bread its structure and chewiness.
- 1 packet (2 1/4 tsp) active dry yeast: This little ingredient brings your bread to life by making it rise beautifully.
- 1 tsp salt: Enhances flavor and helps control yeast activity for balanced fermentation.
- 1 tbsp sugar: Feeds the yeast to create that perfect rise and adds a subtle sweetness.
- 1 cup warm water (110°F/45°C): Activates the yeast; the temperature is key for optimal fermentation.
- 1 tbsp olive oil (or vegetable oil): Adds moisture and tenderness for a soft bite.
- 1 tbsp melted butter (optional, for brushing): Gives the crust a beautiful golden sheen and a hint of richness.
How to Make The Only Bread Recipe You’ll Ever Need Recipe
Step 1: Activate the Yeast
Start by combining the warm water, sugar, and active dry yeast in a bowl. Let it sit for about 5-10 minutes until it becomes foamy on top. This step is crucial because it tells you the yeast is alive and ready to work its magic on the dough.
Step 2: Mix the Dough
In a large mixing bowl, whisk together the flour and salt. Slowly add the yeast mixture and the olive oil. Stir everything together using a wooden spoon or your hands until the dough just starts to form.
Step 3: Knead for Perfection
Transfer the dough to a floured surface and knead it for about 8-10 minutes. You want a smooth, elastic dough that springs back when pressed. Kneading develops the gluten, essential for a chewy, airy crumb.
Step 4: First Rise
Place the dough in a lightly oiled bowl, cover it with a clean kitchen towel or plastic wrap, and let it rise in a warm spot for about 1 to 1 1/2 hours, or until doubled in size. This is where the dough gets its volume and lightness.
Step 5: Shape and Second Rise
Punch down the dough gently to release air bubbles, then shape it into a loaf or a round boule. Place it on a baking sheet or in a loaf pan, cover it again, and let it rise for another 30-45 minutes until puffy.
Step 6: Bake to Golden Glory
Preheat your oven to 375°F (190°C). Optionally, brush the top with melted butter for extra flavor and golden color. Bake the bread for 25-30 minutes until the crust is golden and it sounds hollow when tapped underneath.
Step 7: Cool and Enjoy
Remove the bread from the oven and let it cool on a wire rack for at least 20 minutes before slicing. This step finishes the baking process and ensures the crumb sets perfectly.
How to Serve The Only Bread Recipe You’ll Ever Need Recipe
Garnishes
A simple brush of melted butter after baking elevates the crust’s flavor, but you can also sprinkle some sesame seeds, poppy seeds, or herbs like rosemary before baking to add a little extra personality and flair to your loaf.
Side Dishes
This bread is incredibly versatile. It pairs beautifully with a steaming bowl of soup, a fresh garden salad, or classic dishes like roasted chicken or pasta. The soft crumb and subtle flavor make it a wonderful accompaniment without overpowering any meal.
Creative Ways to Present
Turn your loaf into a centerpiece by slicing it thickly and serving with an assortment of dips like hummus, olive oil with balsamic vinegar, or herb-infused butter. You can also toast slices and top them with avocado or melted cheese for a quick, delicious snack.
Make Ahead and Storage
Storing Leftovers
Once your bread has cooled completely, store it in a paper bag or loosely wrapped in a clean kitchen towel at room temperature. This keeps the crust crisp and the inside soft for up to 2 days.
Freezing
If you want to keep your bread fresh longer, freezing is the way to go. Wrap it tightly in plastic wrap and then a layer of aluminum foil before placing it in the freezer. It can last up to 3 months this way without losing flavor.
Reheating
When ready to enjoy frozen bread, thaw it at room temperature and refresh the crust by warming it in a 350°F (175°C) oven for 5-10 minutes. This simple step makes it taste freshly baked all over again.
FAQs
Can I use whole wheat flour in The Only Bread Recipe You’ll Ever Need Recipe?
Absolutely! You can substitute half of the all-purpose flour with whole wheat flour for a nuttier flavor and denser texture. Just keep in mind you might need to adjust the water quantity slightly.
What if my dough doesn’t rise?
If your dough doesn’t rise, it could be due to old or inactive yeast, or water that’s too hot or too cold. Make sure to use fresh yeast and water at the recommended temperature, about 110°F (45°C), to activate the yeast properly.
Can I make this bread without a stand mixer?
Yes! Kneading by hand is traditional and gives you a better feel for the dough. It just takes a bit more time and elbow grease, but totally worth it for The Only Bread Recipe You’ll Ever Need Recipe.
How do I get a crustier loaf?
For a crunchier crust, place a shallow pan of water in the oven while baking to create steam, or brush the crust with water before baking. Both techniques help develop that irresistible crust texture.
Is this recipe suitable for beginners?
Definitely! The Only Bread Recipe You’ll Ever Need Recipe is designed to be approachable and forgiving, making it perfect for both beginners and experienced bakers looking for a dependable loaf.
Final Thoughts
Giving The Only Bread Recipe You’ll Ever Need Recipe a try is like inviting a little magic into your kitchen. Once you get the hang of it, you’ll be amazed at how rewarding and comforting freshly baked bread can be. So don’t hesitate to dive in, experiment, and share this wonderful loaf with your loved ones – trust me, it’s the bread that keeps on giving.
Print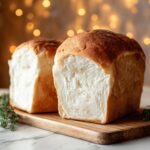
The Only Bread Recipe You’ll Ever Need Recipe
- Prep Time: 15 minutes
- Cook Time: 30 minutes
- Total Time: 2 hours 15 minutes
- Yield: 1 loaf (about 12 slices)
- Category: Bread
- Method: Baking
- Cuisine: American
Description
This simple and reliable bread recipe yields a soft, fluffy loaf with a golden crust using basic ingredients and straightforward steps. Perfect for beginners and seasoned bakers alike, this versatile bread complements any meal and can be customized with various toppings or additions.
Ingredients
Dry Ingredients
- 3 cups all-purpose flour
- 1 packet (2 1/4 tsp) active dry yeast
- 1 tsp salt
- 1 tbsp sugar
Wet Ingredients
- 1 cup warm water (110°F/45°C)
- 1 tbsp olive oil (or vegetable oil)
Optional
- 1 tbsp melted butter, for brushing
Instructions
- Activate the yeast: In a small bowl, combine the warm water with the sugar and yeast. Stir gently and let it sit for about 5-10 minutes until the mixture becomes frothy, indicating that the yeast is active.
- Mix dry ingredients: In a large mixing bowl, whisk together the all-purpose flour and salt to evenly distribute the salt throughout the flour.
- Combine wet and dry ingredients: Pour the activated yeast mixture and olive oil into the flour mixture. Stir with a wooden spoon or dough hook until the dough begins to come together.
- Knead the dough: Transfer the dough to a lightly floured surface and knead for about 8-10 minutes until it becomes smooth and elastic. Alternatively, use a stand mixer fitted with a dough hook for 6-7 minutes on medium speed.
- First rise: Lightly oil a large bowl and place the dough inside, turning it to coat all sides with oil. Cover the bowl with a clean kitchen towel or plastic wrap and let it rise in a warm, draft-free place for about 1 to 1.5 hours or until doubled in size.
- Shape the loaf: Punch down the risen dough to release air bubbles. Shape it into a round or oblong loaf, depending on your preference, and place it on a parchment-lined baking sheet or into a lightly greased loaf pan.
- Second rise: Cover the shaped dough loosely and let it rise again for 30-45 minutes, until it puffs up noticeably.
- Preheat oven: Preheat your oven to 375°F (190°C) while the dough undergoes its second rise.
- Bake the bread: Optionally, brush the loaf with melted butter before baking for a richer crust. Place the bread in the preheated oven and bake for 25-30 minutes, or until the crust is golden brown and sounds hollow when tapped on the bottom.
- Cool and serve: Remove the bread from the oven and let it cool on a wire rack for at least 20 minutes before slicing. This helps set the crumb and improves texture.
Notes
- Ensure the water is warm, not hot, to activate yeast properly without killing it.
- You can substitute olive oil with vegetable oil or melted butter if preferred.
- Adding herbs, garlic, or seeds to the dough can give additional flavor.
- Store bread in an airtight container at room temperature for up to 3 days or freeze for longer storage.


