
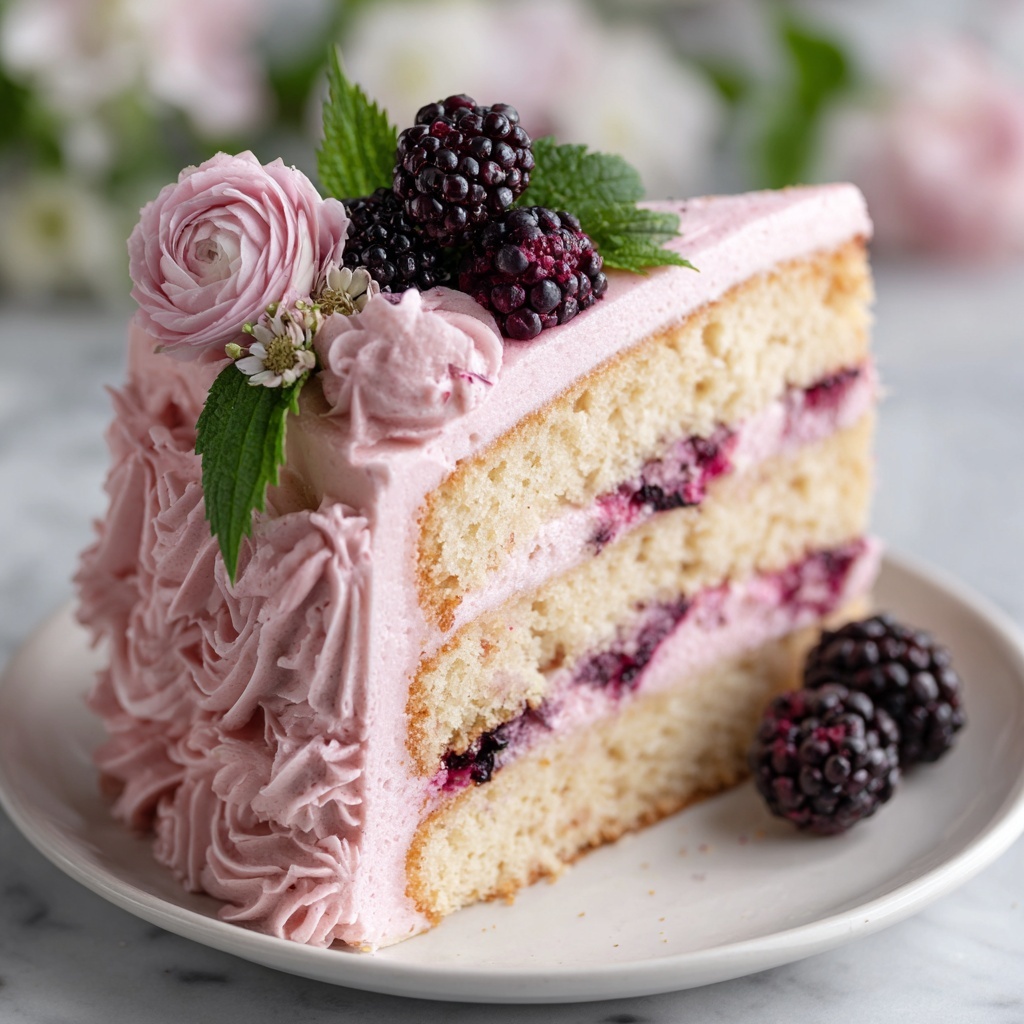
If you have a soft spot for floral flavors and vibrant colors in your desserts, then you are about to fall head over heels for this Hibiscus Bliss Cake Recipe. Combining the tart, cranberry-like brightness of hibiscus with the lush richness of a classic buttercream, this cake is a true celebration of taste and elegance. Each bite offers a perfect balance of tangy and sweet, making it an ideal centerpiece for heartfelt occasions or simply treating yourself to a slice of edible joy. Trust me, once you try this Hibiscus Bliss Cake Recipe, it’ll become one of your go-to favorites for a wildly impressive yet surprisingly easy-to-make dessert.
Ingredients You’ll Need
These simple but essential ingredients come together to create a cake that dazzles with color, flavor, and texture. Each one plays a key role—from the floral depth of hibiscus to the creamy richness of butter—that makes this hibiscus bliss cake recipe unforgettable.
- All-purpose flour (2 1/4 cups): The sturdy foundation that gives the cake its fluffy yet moist crumb.
- Baking powder (2 teaspoons): Helps your cake rise beautifully and become light.
- Baking soda (1/2 teaspoon): Works alongside baking powder to create perfect lift and texture.
- Fine salt (1/2 teaspoon): Enhances all the flavors, balancing the tartness of hibiscus.
- Granulated sugar (1 1/4 cups): Sweetens the cake while adding to its tender crumb.
- Unsalted butter, softened (1/2 cup): Adds richness and moistness to every bite.
- Neutral oil like canola or vegetable (1/3 cup): Keeps the cake wonderfully moist without overpowering flavors.
- Large eggs, room temperature (3): Bind everything together and help with structure.
- Vanilla extract (2 teaspoons): Brings warmth and depth to the floral notes.
- Almond extract (optional, 1/2 teaspoon): A subtle hint that complements the hibiscus beautifully.
- Buttermilk, room temperature (1 cup): Adds tanginess and tenderizes the crumb.
- Strong hibiscus tea, cooled (1/2 cup): Infuses the cake with that gorgeous floral tartness and rich pink color.
- Finely ground dried hibiscus (optional, 2 tablespoons): For an extra punch of flavor and a more vibrant hue.
- Granulated sugar for syrup (1/4 cup): Sweetens the hibiscus syrup that keeps layers moist and flavorful.
- Lemon juice (1 tablespoon): Adds brightness to the syrup and frosting to highlight the floral notes.
- Unsalted butter for buttercream, softened (1 cup): Creates a luxurious, creamy base for the frosting.
- Powdered sugar (4 cups): Sweetens and thickens the buttercream to perfect spreadable consistency.
- Pink food coloring (optional, 1-2 drops): For that stunning rosy hue in the frosting.
- Optional garnishes: Dried hibiscus petals, fresh berries, or lemon zest to finish with flair.
How to Make Hibiscus Bliss Cake Recipe
Step 1: Prepare Hibiscus Tea and Preheat Oven
Start by steeping dried hibiscus flowers in hot water until the tea turns a deep ruby red—this will be your flavor and color superstar. Once brewed, let it cool completely. Meanwhile, preheat your oven to 350°F (175°C) and prepare two 8-inch round cake pans with butter and parchment paper for easy removal later.
Step 2: Mix Dry Ingredients
In a medium bowl, whisk together all-purpose flour, baking powder, baking soda, salt, and if you’re using it, finely ground dried hibiscus. This is where part of your cake’s distinct color and floral aroma starts to come together, so get that nicely incorporated.
Step 3: Beat Sugar, Butter, and Oil
In a large mixing bowl, beat granulated sugar, soft unsalted butter, and neutral oil until the mixture is light, creamy, and fluffy—this usually takes about 2 minutes. This step is crucial for a tender crumb and rich flavor, so don’t rush it!
Step 4: Add Eggs and Extracts
Beat in eggs one at a time, making sure each is fully incorporated before adding the next. Then mix in your vanilla and almond extract, which round out all those floral notes with comforting warmth and subtle nuttiness.
Step 5: Combine Wet and Dry Ingredients
Add your dry ingredients in three batches, alternating with buttermilk and hibiscus tea. Start and end with the dry ingredients. Mix gently after each addition to combine everything just until there are no streaks of flour. Overmixing can make the cake tough, so be careful!
Step 6: Bake the Cake Layers
Divide the batter evenly between your prepared pans. Bake for 25 to 32 minutes, checking with a toothpick which should come out clean or with a few moist crumbs. This ensures your cake layers are perfectly moist but fully baked.
Step 7: Cool Cakes for Assembly
Let the cakes rest in their pans for about 10 minutes before turning them out onto wire racks to cool completely. This cooling time is important to avoid melting your buttercream when assembling.
Step 8: Prepare Hibiscus Syrup
Simmer 1/2 cup strong hibiscus tea with 1/4 cup sugar for about 2 to 3 minutes until it slightly thickens. Stir in lemon juice and cool. This syrup keeps the cake layers deeply flavorful and moist, enhancing the floral notes beautifully.
Step 9: Make Hibiscus Buttercream
Beat softened butter until smooth. Gradually add powdered sugar, beating until light and fluffy. Incorporate a pinch of salt, lemon juice, and hibiscus tea one tablespoon at a time, until the frosting is silky and spreadable. Add a drop or two of pink food coloring if you want that extra pop of rosy color.
Step 10: Assemble Your Hibiscus Bliss Cake Recipe
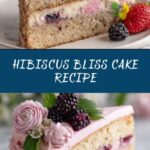
If needed, level the cake layers for an even finish. Brush each layer generously with hibiscus syrup, then spread a thick layer of buttercream between them. Once stacked, frost the entire cake smoothly and add your favorite garnishes like fresh berries, lemon zest, or food-safe dried hibiscus petals for that signature final touch.
How to Serve Hibiscus Bliss Cake Recipe
Garnishes
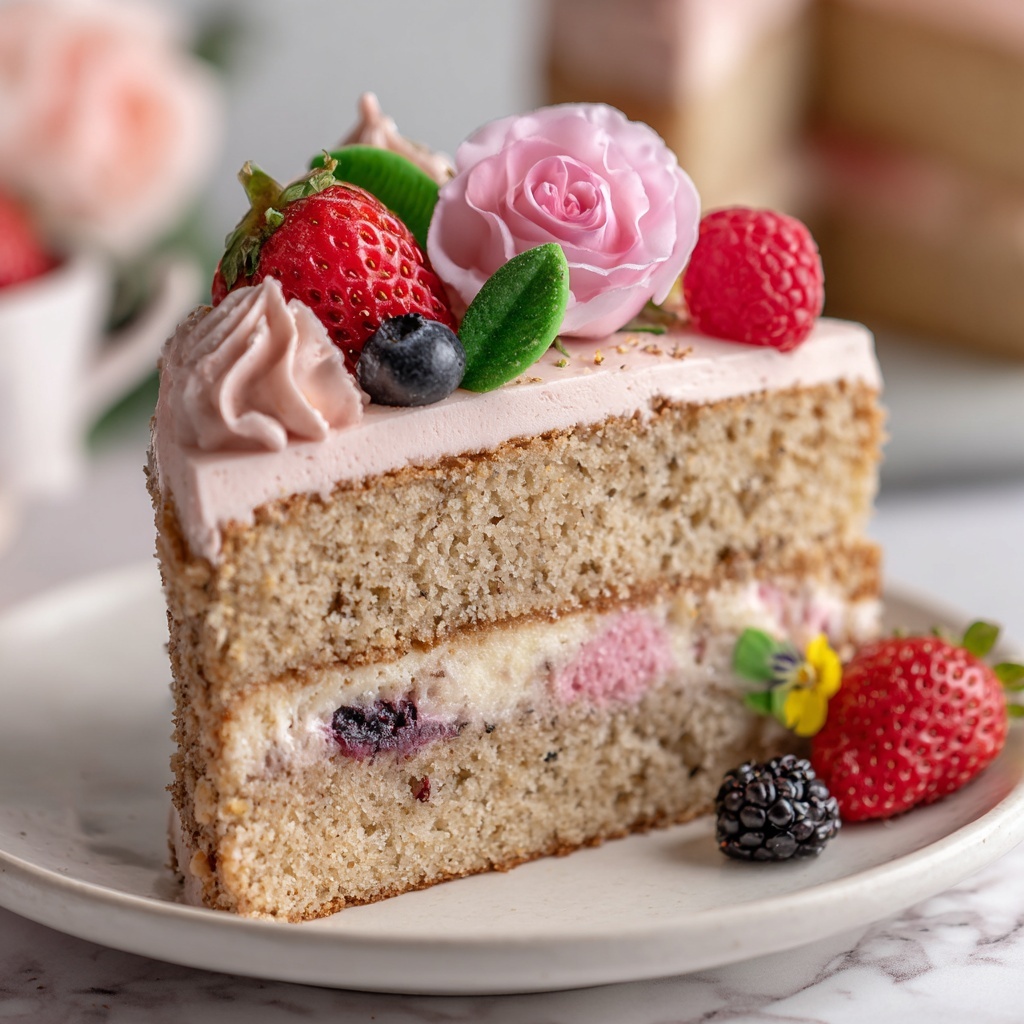
Adding a few sprigs of dried hibiscus petals or a handful of fresh berries not only brightens the look of your cake but also layers in complementary flavor and texture. Lemon zest adds a wonderful zing that plays off the tartness of the hibiscus perfectly.
Side Dishes
This cake shines best when paired with a light, fresh side such as a dollop of whipped cream or a simple fruit salad featuring berries, citrus slices, or tropical fruits to enhance the floral and tart flavors without overwhelming the palate.
Creative Ways to Present
Try serving this Hibiscus Bliss Cake Recipe on a rustic wooden board for a charming, casual vibe or elevate it with delicate edible flowers alongside each slice for a sophisticated, celebratory touch. For parties, mini versions in cupcake form decorated with a swirl of hibiscus buttercream can steal the show!
Make Ahead and Storage
Storing Leftovers
Cover your frosted hibiscus bliss cake tightly with plastic wrap or a cake dome and keep it in the refrigerator for up to 4 days. This helps maintain freshness and keeps the buttercream stable while allowing the flavors to meld brilliantly.
Freezing
To freeze, wrap each cake layer well in plastic wrap and foil, or freeze the fully assembled and frosted cake in a cake saver container for up to one month. Thaw overnight in the refrigerator for best results.
Reheating
Let refrigerated slices sit at room temperature for 20 to 30 minutes before serving to soften the crumb and let the buttercream lose its chill. This simple step transforms the texture and flavor, making every bite melt in your mouth.
FAQs
Can I use hibiscus tea bags instead of dried hibiscus flowers?
Absolutely! Hibiscus tea bags can work as a substitute, although the flavor may be a bit lighter compared to using dried flowers. You might want to increase the quantity slightly to achieve a richer taste.
Is the almond extract necessary?
No, the almond extract is optional but recommended. It provides a subtle nutty note that complements the hibiscus beautifully. If you have nut allergies or prefer to keep it simple, just omit it without worry.
Can I make this cake gluten-free?
With some experimentation, yes! You would need to swap the all-purpose flour for a gluten-free baking blend that includes xanthan gum to mimic the structure. Keep in mind baking times and textures may vary.
How do I make the cake layers more vibrant pink?
The color comes naturally from the hibiscus tea and ground hibiscus, but adding a few drops of pink food coloring to the batter or buttercream can intensify the hue to your liking.
What if I don’t have buttermilk on hand?
No problem! You can substitute with regular milk plus one tablespoon of lemon juice or vinegar, let it sit for 5 minutes to curdle, and then use it just like buttermilk for that essential tang.
Final Thoughts
When you bake this Hibiscus Bliss Cake Recipe, you’re not just making a dessert—you’re crafting an experience full of delightful flavors, stunning color, and that little touch of floral magic that only hibiscus can bring. Whether it’s a special celebration or a sweet indulgence for yourself, give this recipe a try. I promise, it will become one of those irresistible cakes you want to share again and again!
Print
Hibiscus Bliss Cake Recipe
- Prep Time: 30 minutes
- Cook Time: 30 minutes
- Total Time: 1 hour
- Yield: 12 servings
- Category: Dessert
- Method: Baking
- Cuisine: American
- Diet: Vegetarian
Description
Hibiscus Bliss Cake is a beautiful, floral dessert featuring a moist hibiscus-infused cake layered with a delicate hibiscus buttercream. This visually stunning and flavorful cake combines the tart, cranberry-like notes of hibiscus with a balance of lemon and vanilla, perfect for celebrations or an elegant treat. The cake uses both hibiscus tea and finely ground dried hibiscus for maximum flavor and a lovely pink hue, complemented by a syrup soak and a luscious, smooth buttercream frosting.
Ingredients
Hibiscus Cake
- 2 1/4 cups all-purpose flour
- 2 teaspoons baking powder
- 1/2 teaspoon baking soda
- 1/2 teaspoon fine salt
- 1 1/4 cups granulated sugar
- 1/2 cup unsalted butter, softened
- 1/3 cup neutral oil (canola or vegetable)
- 3 large eggs, room temperature
- 2 teaspoons vanilla extract
- 1/2 teaspoon almond extract (optional)
- 1 cup buttermilk, room temperature
- 1/2 cup strong hibiscus tea, cooled
- 2 tablespoons finely ground dried hibiscus (optional for stronger flavor and color)
Hibiscus Syrup
- 1/2 cup strong hibiscus tea
- 1/4 cup granulated sugar
- 1 tablespoon lemon juice
Hibiscus Buttercream
- 1 cup unsalted butter, softened
- 4 cups powdered sugar
- 3 to 5 tablespoons hibiscus tea, cooled
- 1 tablespoon lemon juice
- Pinch of salt
- Optional: 1 to 2 drops pink food coloring
Optional Garnish
- Dried hibiscus petals (food-safe)
- Fresh berries
- Lemon zest
Instructions
- Prepare Hibiscus Tea and Pans: Steep dried hibiscus in hot water until it turns deep ruby-red and allow it to cool completely. Preheat your oven to 350°F (175°C) and grease and line two 8-inch round cake pans or three 6-inch pans with parchment paper.
- Mix Dry Ingredients: In a bowl, whisk together all-purpose flour, baking powder, baking soda, salt, and if using, finely ground dried hibiscus powder to evenly distribute the flavor and color.
- Cream Sugar and Fats: In a large bowl, beat together granulated sugar, softened butter, and neutral oil until the mixture becomes light and creamy, about 2 minutes. This step ensures a tender, fluffy cake texture.
- Add Eggs and Flavorings: Beat in eggs one at a time to incorporate them fully. Then mix in vanilla extract and almond extract if using, to enhance the aromatic profile of the cake.
- Combine Wet and Dry Ingredients: Alternately add the dry ingredient mixture in three parts with the buttermilk and cooled hibiscus tea in between, mixing gently after each addition. Be careful not to overmix to keep the cake tender.
- Bake the Cake: Pour the batter evenly into the prepared pans and bake for 25 to 32 minutes. Test doneness by inserting a toothpick into the center of the cake; it should come out clean or with a few moist crumbs attached.
- Cool Cakes: Let the cakes cool in their pans for 10 minutes to set, then turn them out onto a wire rack to cool completely before frosting.
- Prepare Hibiscus Syrup: In a small saucepan, simmer the hibiscus tea and granulated sugar for 2 to 3 minutes until slightly thickened. Remove from heat, stir in lemon juice, and allow to cool. This syrup will keep the cake moist and add extra hibiscus flavor.
- Make Hibiscus Buttercream: Beat softened butter until smooth and creamy. Gradually add powdered sugar, beating until the mixture is fluffy. Mix in a pinch of salt, lemon juice, and hibiscus tea a tablespoon at a time until achieving a smooth, spreadable consistency. Add optional pink food coloring to brighten the frosting.
- Assemble the Cake: Level cake layers if needed. Brush each layer evenly with the hibiscus syrup to infuse moisture and flavor. Spread a layer of buttercream between each cake layer, then cover the entire outside of the cake with the remaining frosting smoothly. Garnish with dried hibiscus petals, fresh berries, or lemon zest to add visual appeal and complementary flavors.
Notes
- Hibiscus lends a tart, cranberry-like flavor that is balanced by lemon and vanilla for a well-rounded taste.
- For maximum hibiscus flavor and vibrant color, use both strong brewed hibiscus tea and finely ground dried hibiscus in the batter.
- If dried hibiscus is unavailable, hibiscus tea bags can be substituted, but expect a lighter flavor impact.
- Store the frosted cake covered in the refrigerator for up to 4 days; let cake slices come to room temperature for 20 to 30 minutes before serving for optimal softness.